
Help Docs
Editing Articles and Categories
The bulk of your website's content lives in Articles and Categories. Look here first if you need help editing something.
Find an Article (essentially, one of your "pages")
If you cannot find the page you're looking for, it may be located elsewhere - as a Category or Module for example. Your homepage is typically comprised of several modules. If you want to edit your homepage, see our section on Editing Your Homepage and the section on Editing Modules, or contact us if you need additional help locating a page.
Adding a New Article
REMEMBER: Always click Save/Save & Close for your changes (click Cancel if you do not want your changes to take effect). Please note that if you delete or unpublish an Article connected to a Menu item, you will need to reassign that Menu item to a published item or retire it.
Item Formatting 101
Here are some basic tips for formatting the content within your items:
- Headings: To create headings (and keep things consistent in the site), highlight the text to be made a heading and under Format, select Heading 2 or Heading 3, 4, etc. Try to be consistent and match the heading choices from other pages. Heading 1 is used in the page title automatically so it shouldn't be used again.
- Line break (but not hard return): In HTML, hitting enter will give a hard return which will create a paragraph space between lines. Click Shift and then Enter to get a line break.
- Bullets or Number Lists: Enter your text with hard returns between the lines you want to bullet point (or number). Select the lines and click the Unordered List or Ordered List icons.
- Bold, Italics, or Underlines: Use Bold and Italics sparingly for impact. Avoid Underlining as it can make the text look like a hyperlink.
Trying to change the colors, fonts, or design of your site? See this question for information on your site's style.
Why Aren't My Changes Showing Up?
If you're making edits on your site and they are not appearing on the front end, it's likely a caching issue. Here are three things to try:
- Refresh the page on the front end of the site. It may seem obvious but it's any easy step to overlook.
- Try clearing the website's cache by clicking the "Clean Cache" to clean Joomla's cache and "Invalidate Cache" to force your browser to reload the site. Use the buttons at the top of Joomla on the site's backend.

- Try clearing your browser's cache. Here are instructions for Chrome and Firefox, these are the browser's we recommend for making edits on your website. You do not need to clear your browsing history or cookies, just your cache.
If you've tried these steps and your edits are still not appearing, you can contact us for help. Please be as detailed as possible with links, screenshots, and a full description of your problem.
Why Is There A Lock On My Item?
You may go to edit an item and find a lock icon next to it, making it so you are unable to open the item.

This appears for one of two reasons:
- Someone else is currently editing the item
- When the item was last accessed, it wasn't closed properly. This is why we try to stress the importance of clicking Close or Save & Close when you're done editing an item, instead of clicking the Back button on your browser.

In either case, the lock is appearing because Joomla believes someone is still editing the item and has locked editing so that multiple people cannot edit it at the same time.
If you're sure no one else is currently trying to edit the item, you can contact us to unlock it for you. Please let us know the title of the specific item when you do.
Add or Change the Intro or Full Article Image
Check the front end of your website to make sure the image appears as you intended. Note that the location and size are preset in the Image tab to maintain consistency across the website.
For questions and tips on the images themselves see our Photos & Images help section.
Insert or Change an Image in the Content of an Item
This should be considered a secondary image, the first being the main image for the page that you add to your Image tab. For more on this see: Add or Change an Item's Main Image.
To insert an image (or change an existing one) that is further down in your Item's content do the following:
1. From your opened Item, place your cursor where you'd like to insert the image then select the Insert Image button from your Editing Menu. If you're changing an existing image, select the image itself, then select the Insert Image button.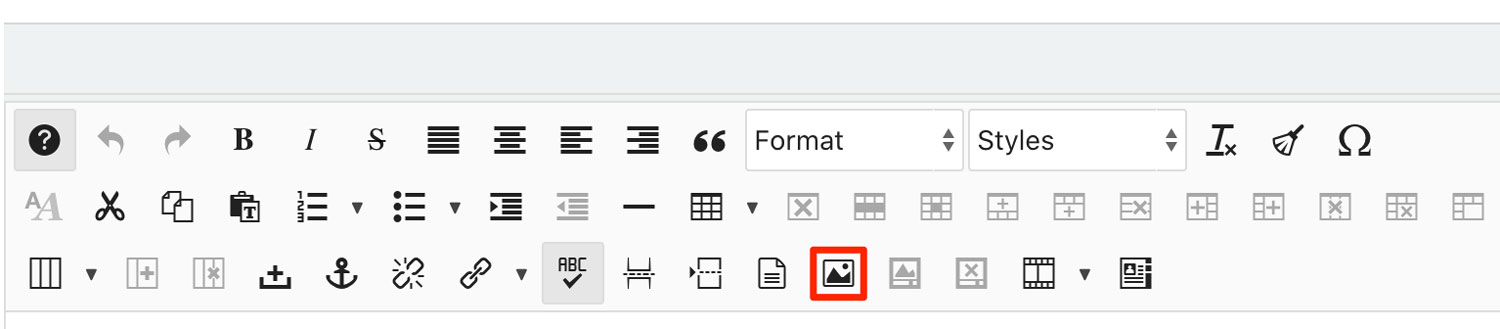
2. From the Image Manager Extended window select an already uploaded image from the files below or select Upload to choose a file from your computer.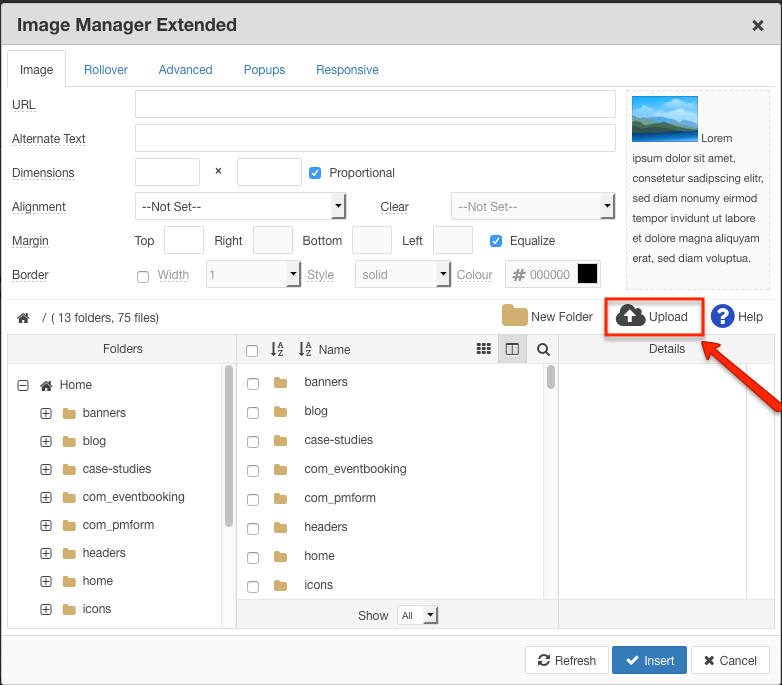
3. From the Upload Window, you can drag a file into the window or use Browse to select from your computer.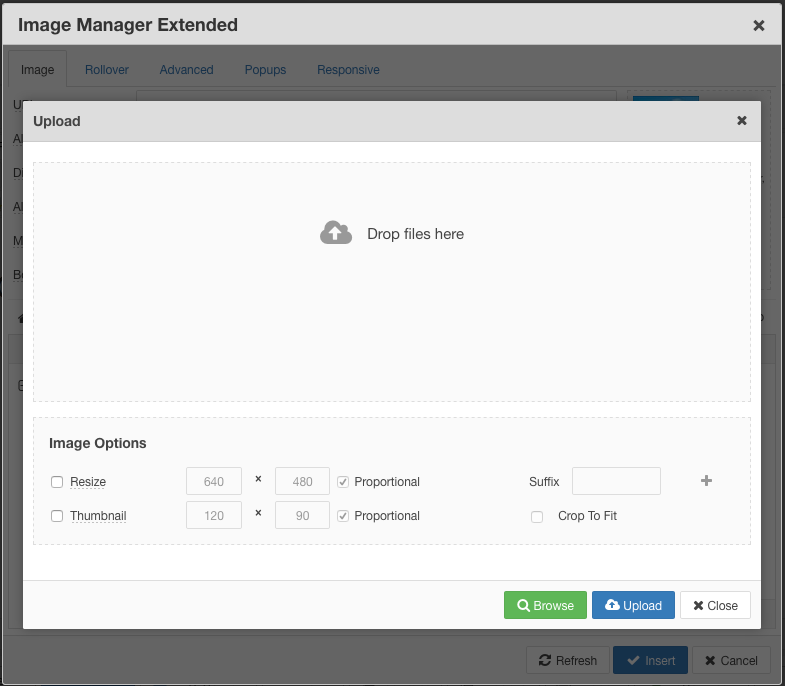
4. Once the file has been added, click on Upload.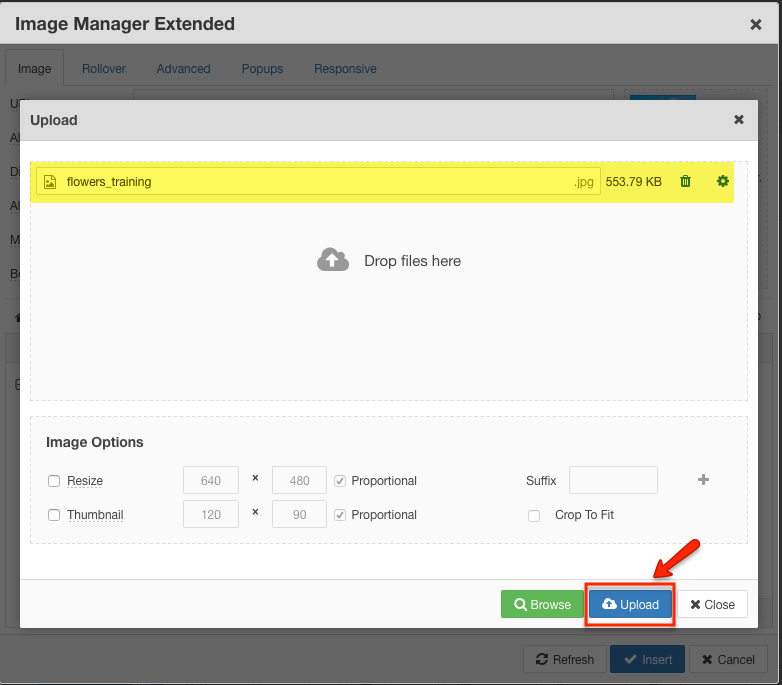
5. Back in the Image Manager Extended window, you will see the image file appear. Click on the file name. Once you've clicked on the file name, it will populate a URL.
You will then have several options to adjust the size and dimensions of the image.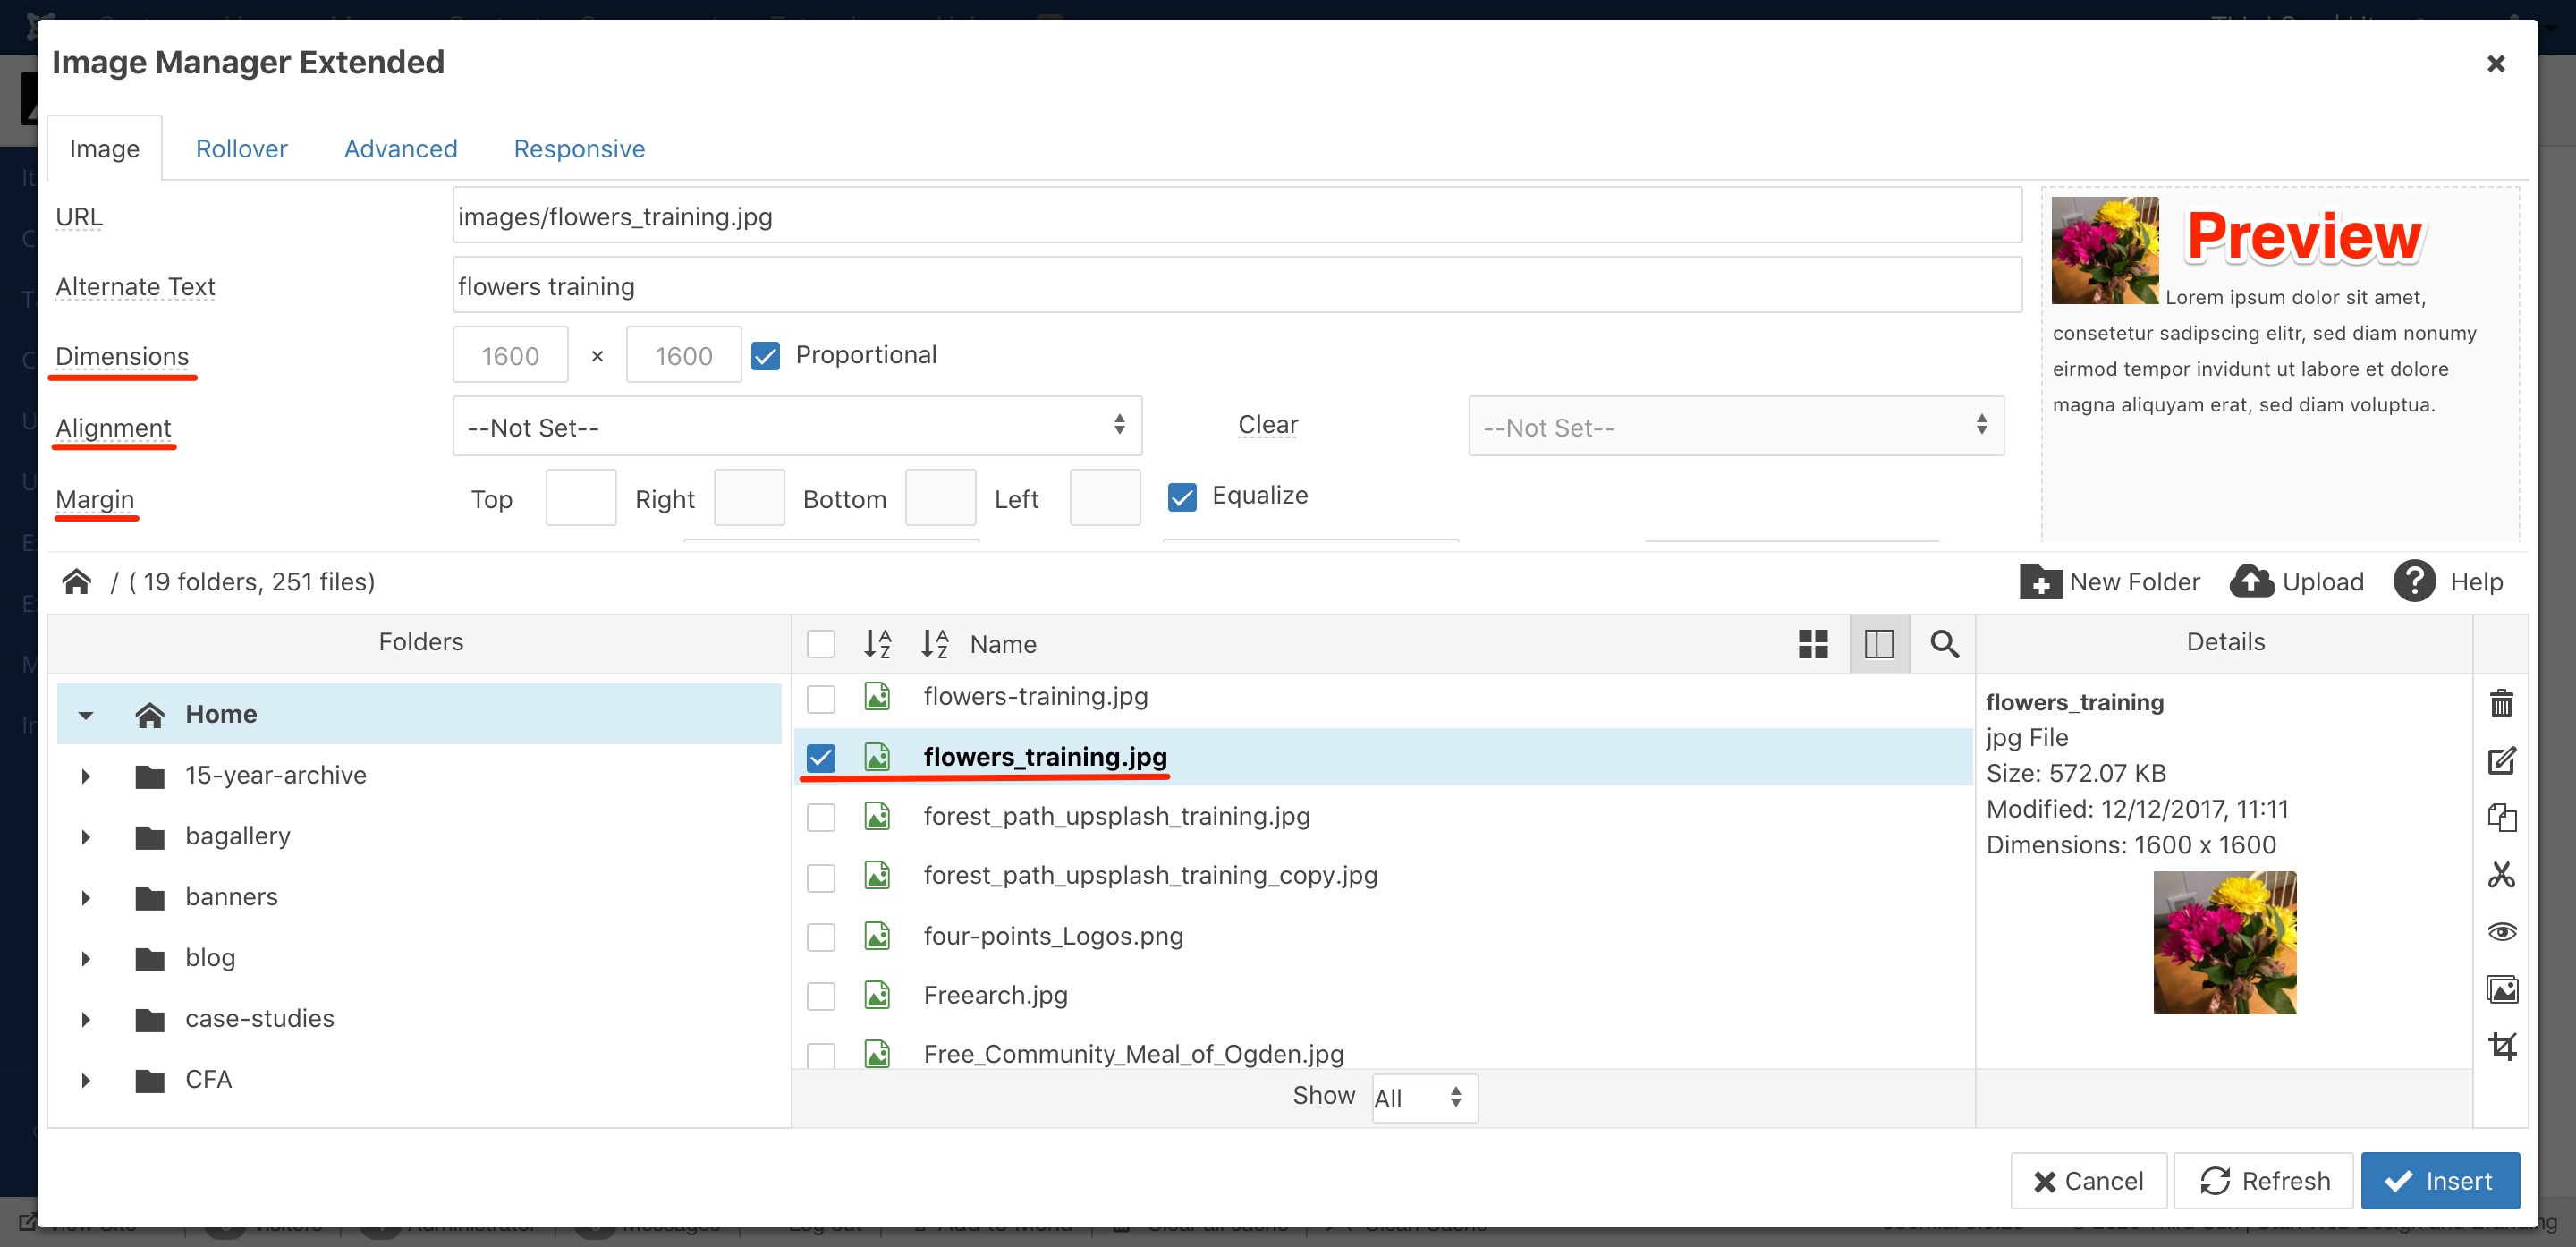
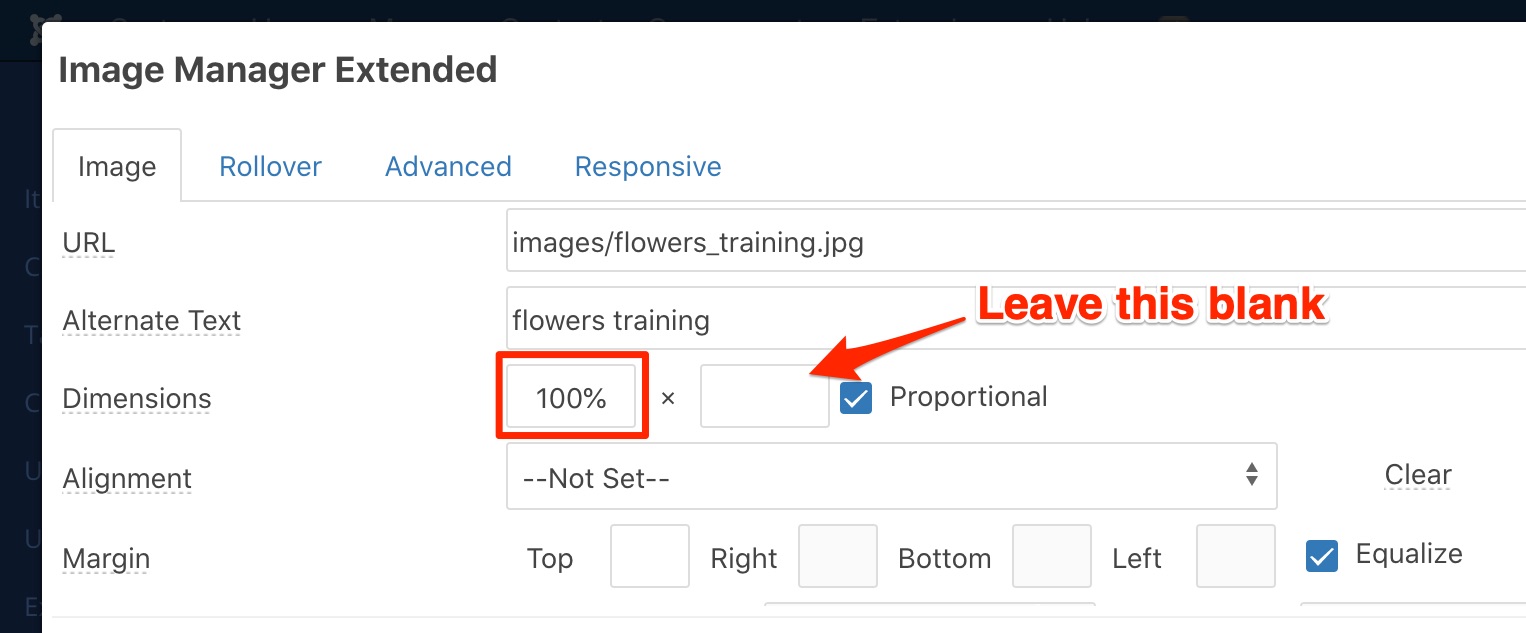
To have the image display at full-width (this is often best these days with mobile phones as long as the photos are not vertical). In Dimensions change the width (first box) to “100%” and delete the height or leave blank, then click Insert at the bottom:
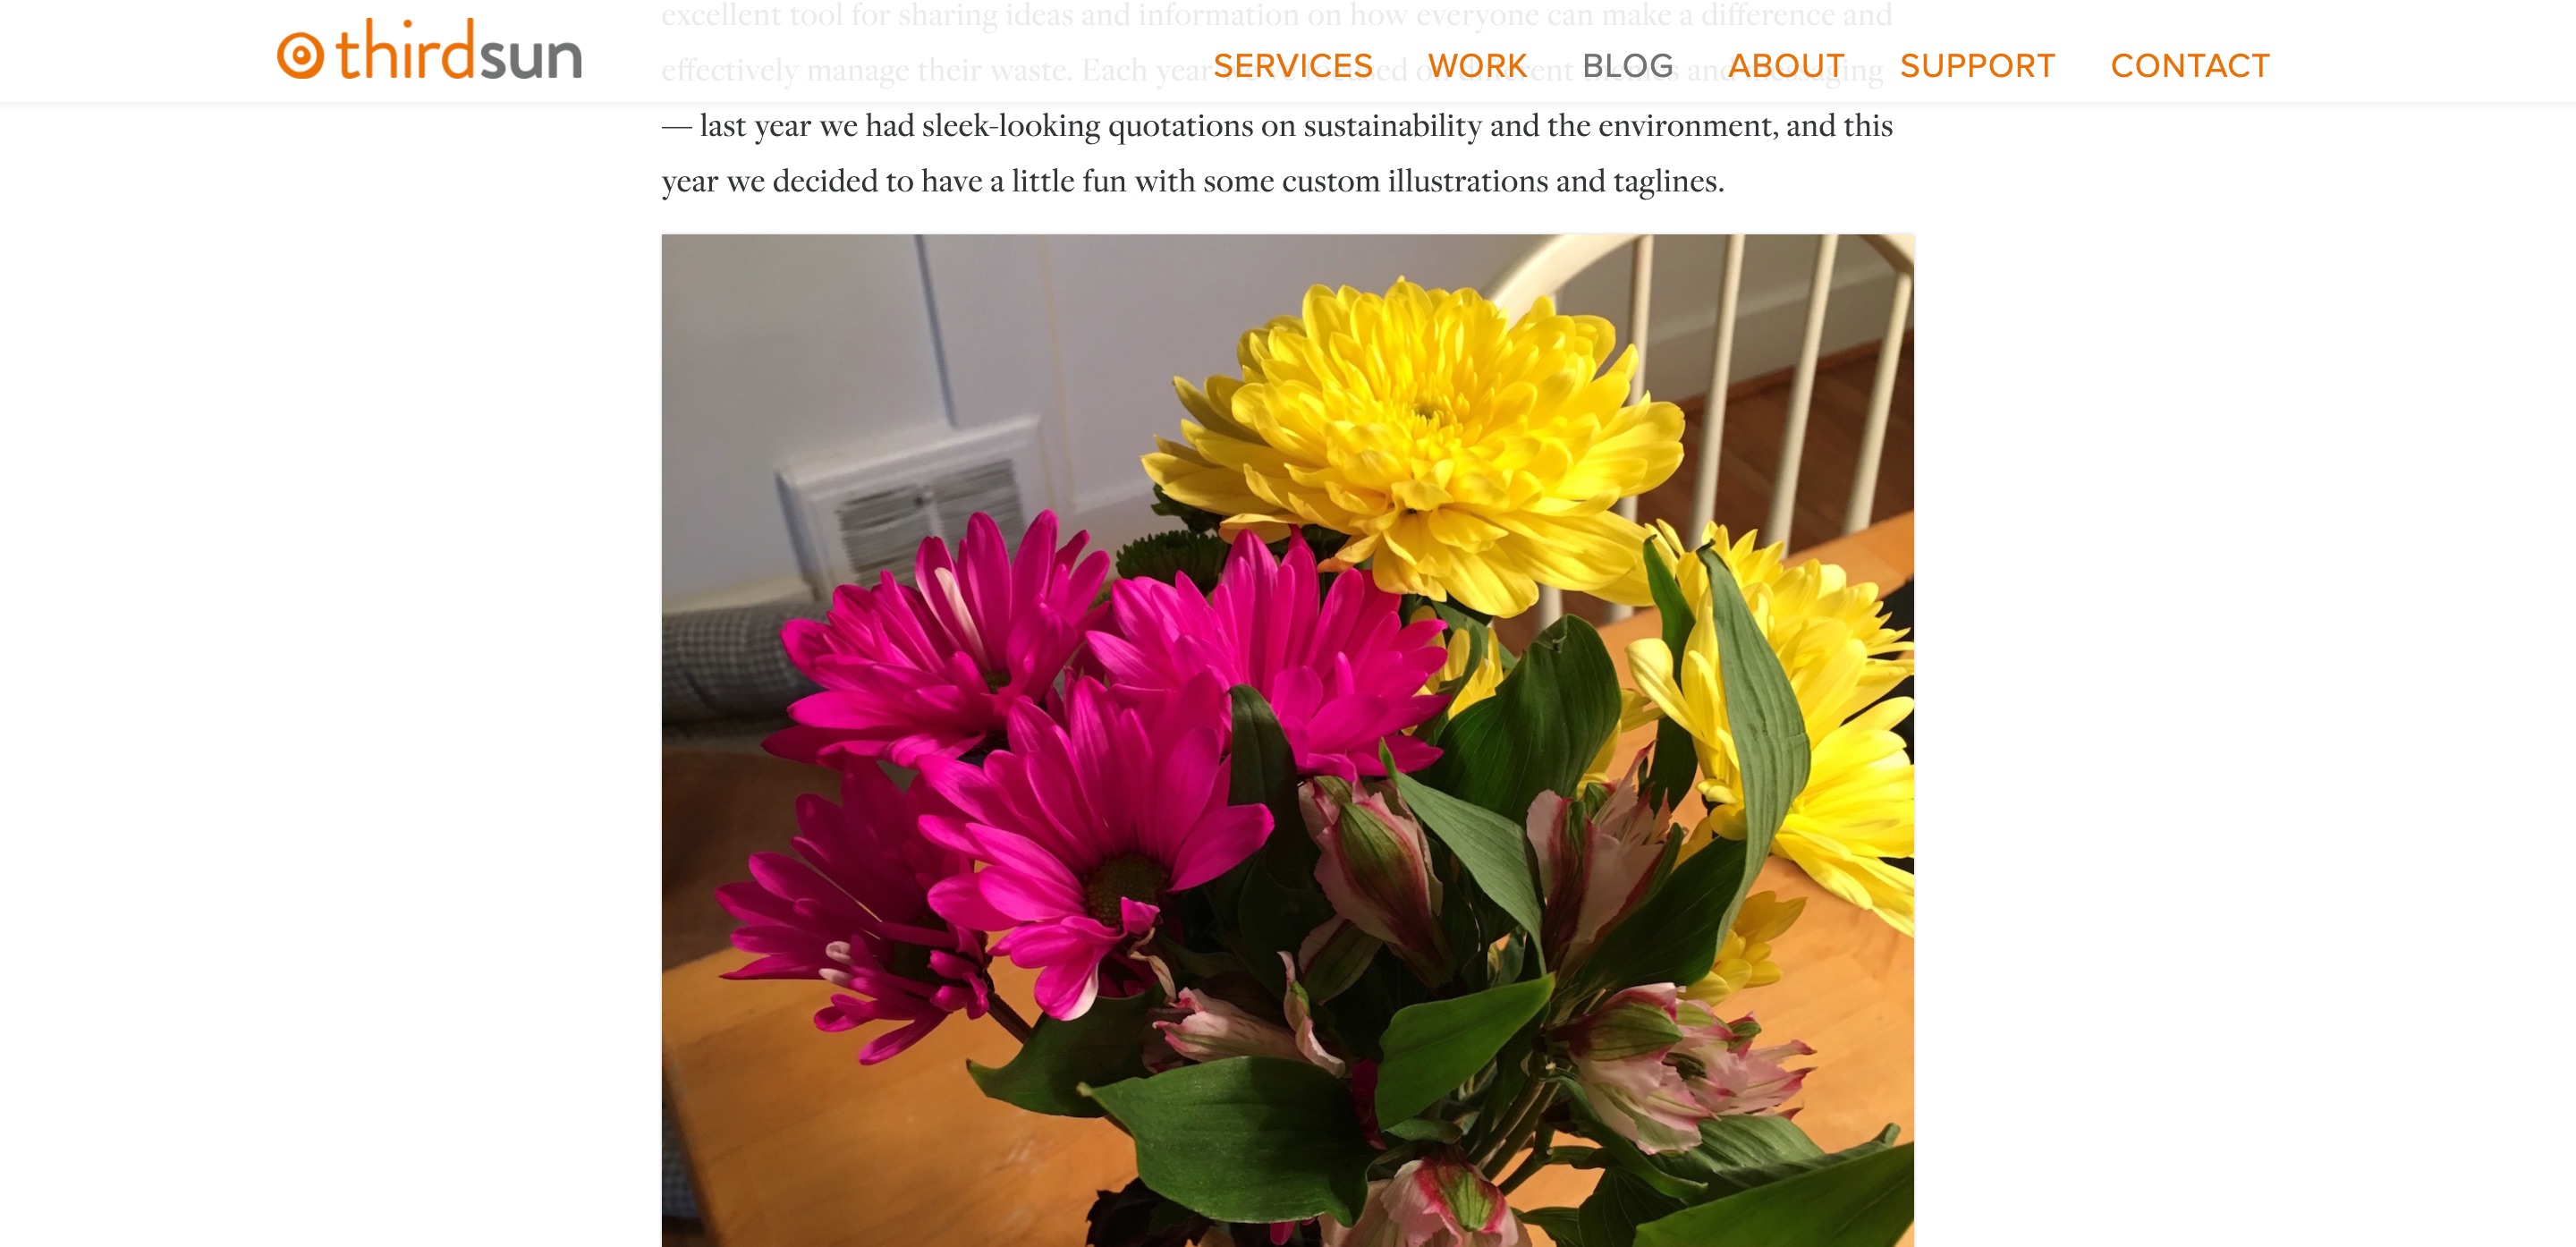
6. Your image will appear in content of your Item. Click Save & Close and review on front end/published version of your website to ensure it appears as you intended.
This is how it will display, at the full-width as the rest of your site content:
*Notes on Editing Images: Editing images can be a struggle for clients but as the website manager, you should try to 1) acquire a photo editing program and 2) understand what kinds of images should be used (and not used). See our Images Section for more info.
Add a Link to Another Page on Your Website
Do you need to add a link to another page on your website?
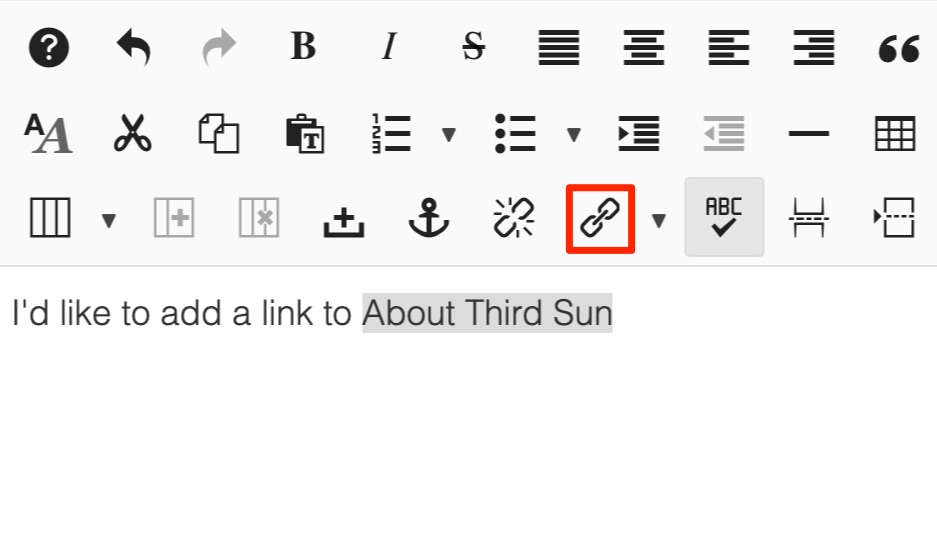
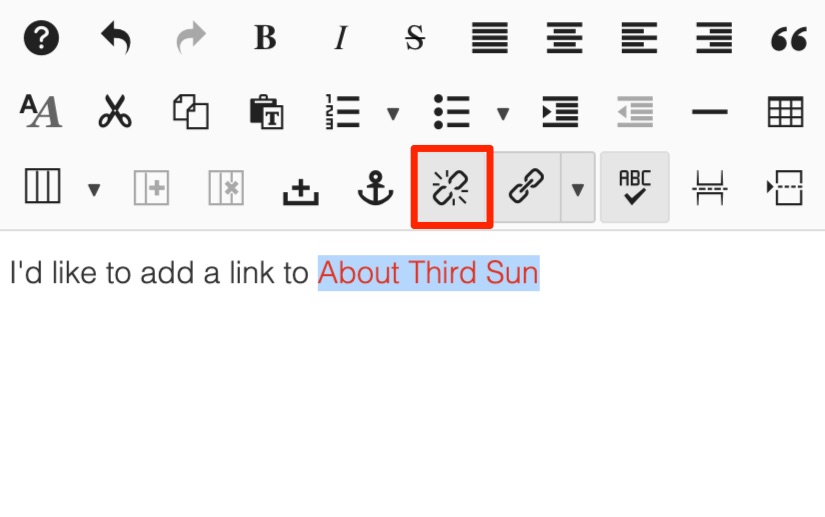
1. From inside your selected Item or Custom Module type the text you'd like to link.
2. Select your desired text and in your editing menu, select the Link button (chain link icon).
3. In the link pop-up window select your desired location on you website by expanding the Main Menu or K2 Items & Categories and select the page the you'd like to link to. The URL will populate based on your selection. Next click Insert.
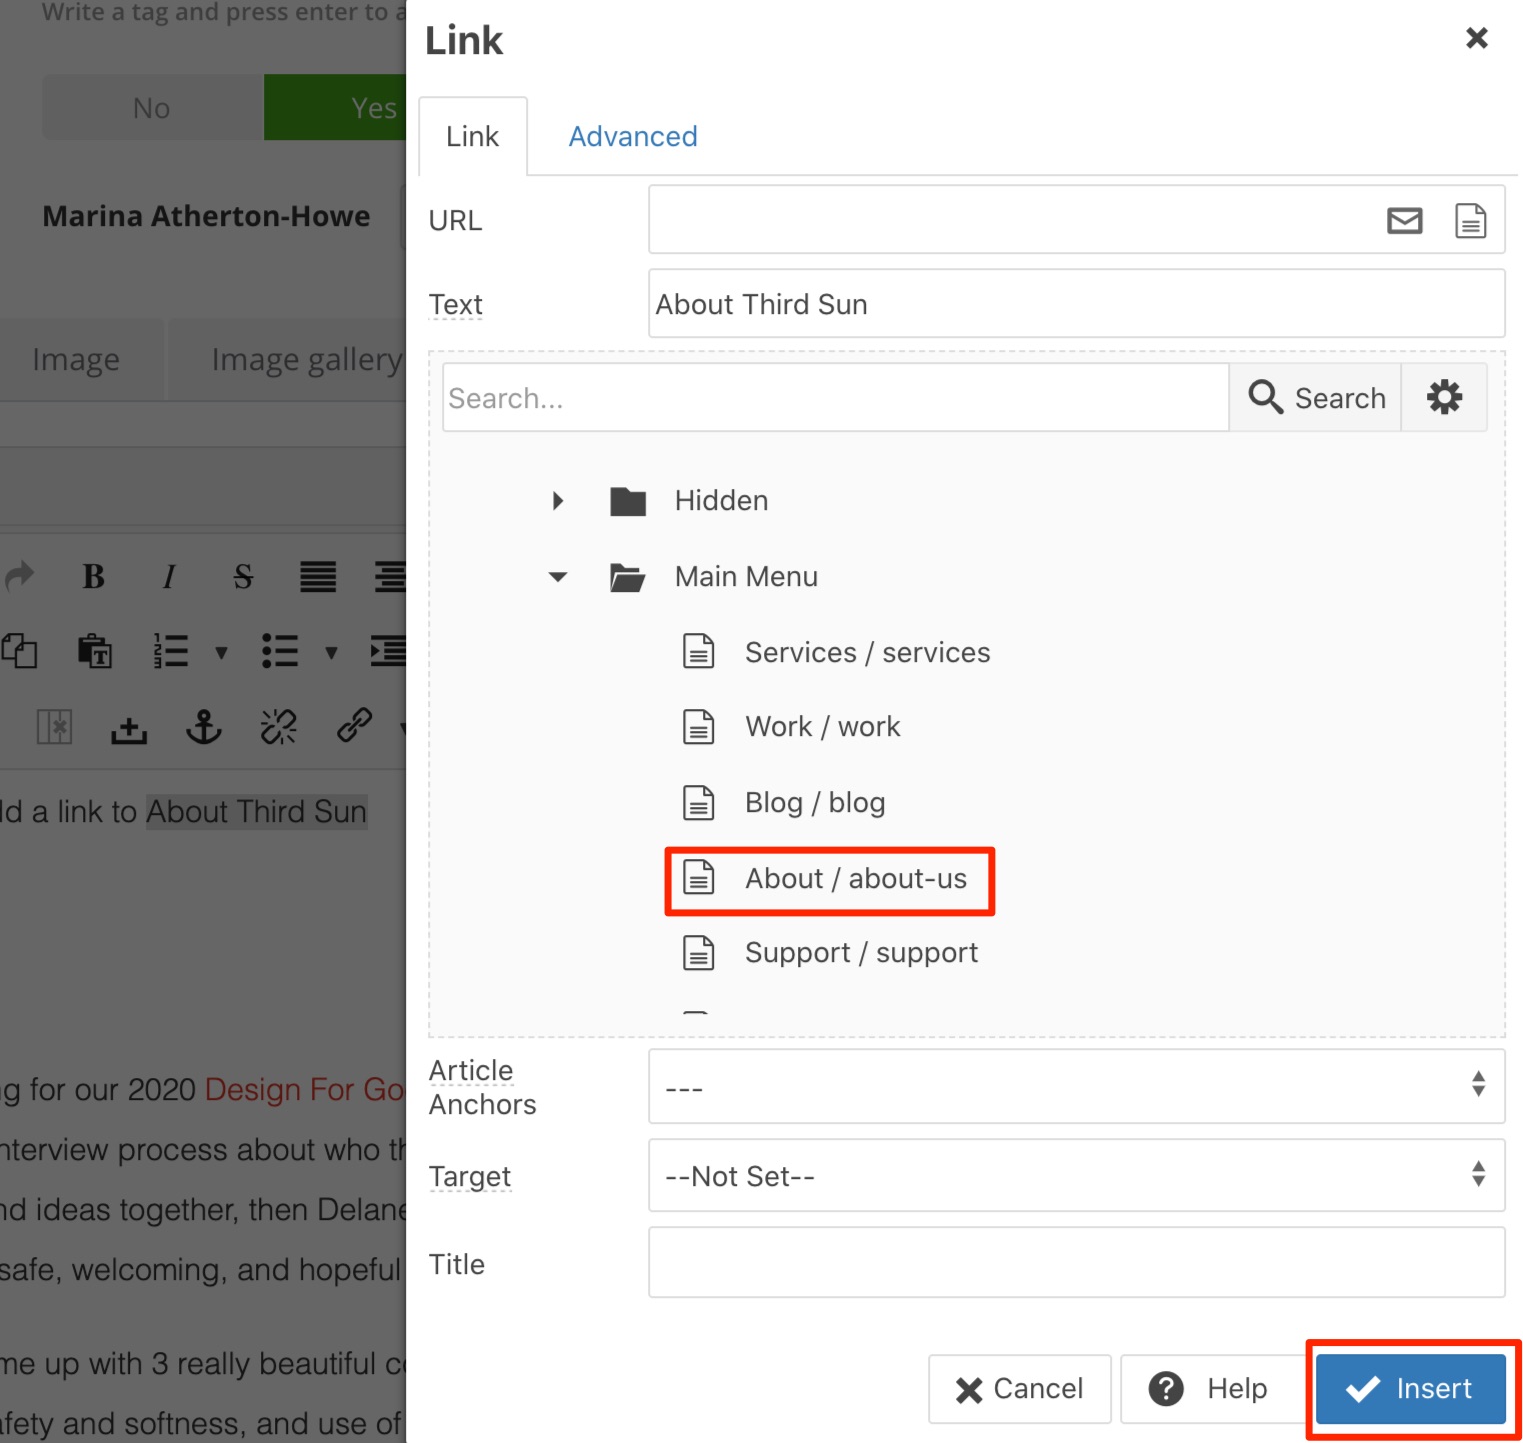 4. Your linked text will now appear in red. And when you have your cursor on it, the Link and Unlink buttons will be highlighted. The Unlink button will remove your link.
5. Save & Close.
6. Check your link on the front end of your website to ensure it's working the way you intended.
Add a Link to an External Website
Do you need to add a link to another website on your website?
1. From inside your selected Item, Custom Module, or Category type the text you'd like to link.
2. Select your desired text and in your editing menu select the Link button (chain link icon).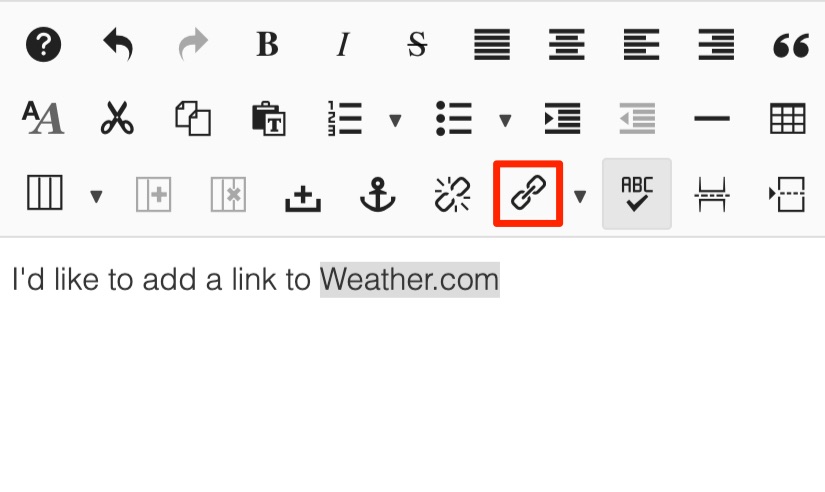
3. In the link pop-up window complete three tasks:
-
Enter the URL to your desired destination
-
From the Target dropdown select Open in new window
-
Click Insert
4. Your linked text will now appear in red. And when you have your cursor on it, the Link and Unlink buttons will be highlighted. The Unlink button removes a link - to use, simply select the text you no longer want linked and click the Unlink button.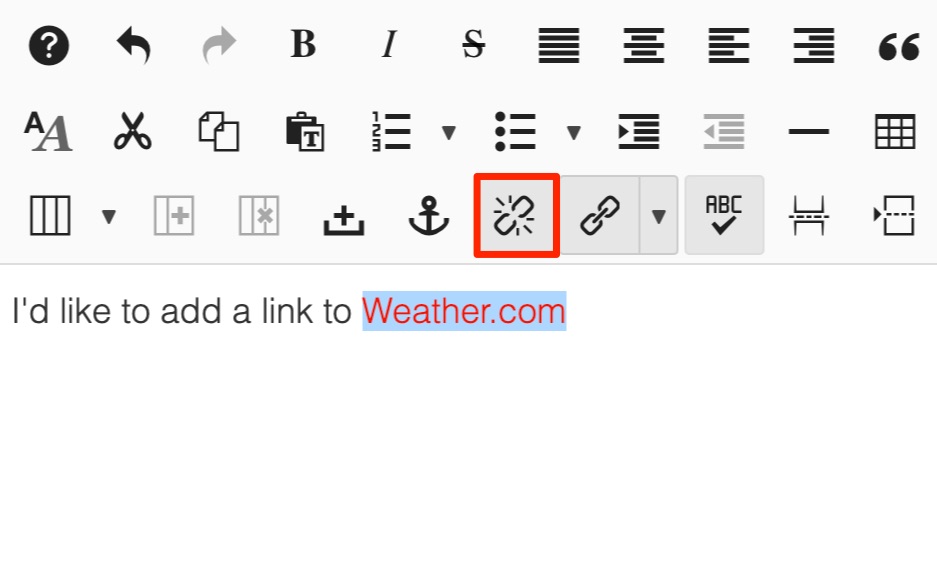
5. Save & Close.
6. Check your link on the front end of your website to ensure it's working the way you intended.
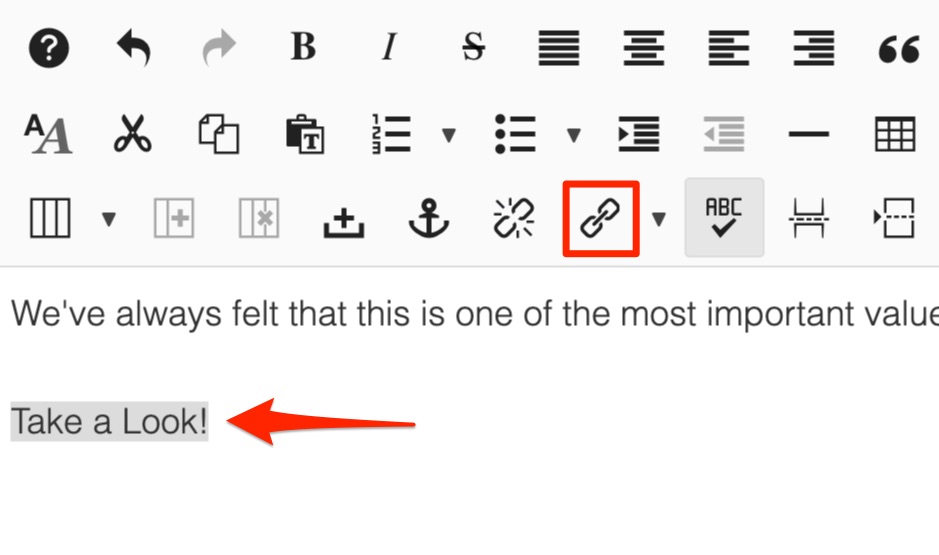
Add a Button-Style Link
Sometimes you'd like to add a button link to make a call to action stand out. How your button link appears (it's style) is predetermined in you Custom Style Sheet (CSS). This is not editable. Where you insert it, where you link it, and what copy you use in the button is up to you.
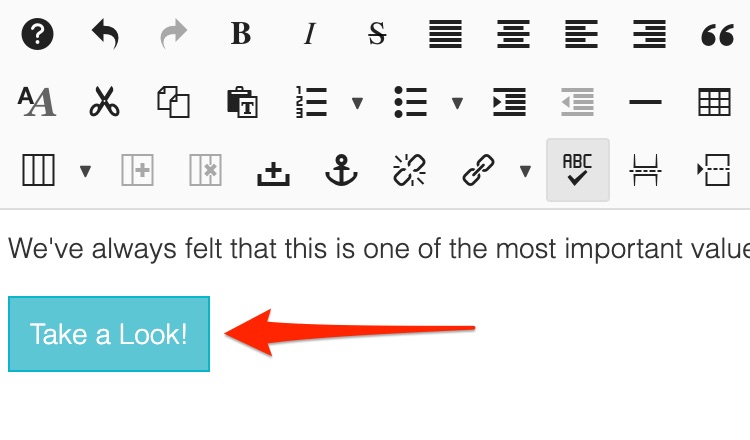
1. In your item's text editor area, enter the button's copy. Keep it short and clear what clicking on the button will get the user. Example: Take a Look!
Highlight your copy (text) and select the link button from your Editing Menu.
2. Create your link from the drop downs below or add an outside link in the URL space. For more help on this see: Add a Link.
3. In the link window, tab to Advanced. Under Class enter btn.
4. Click on Insert at the bottom of the window.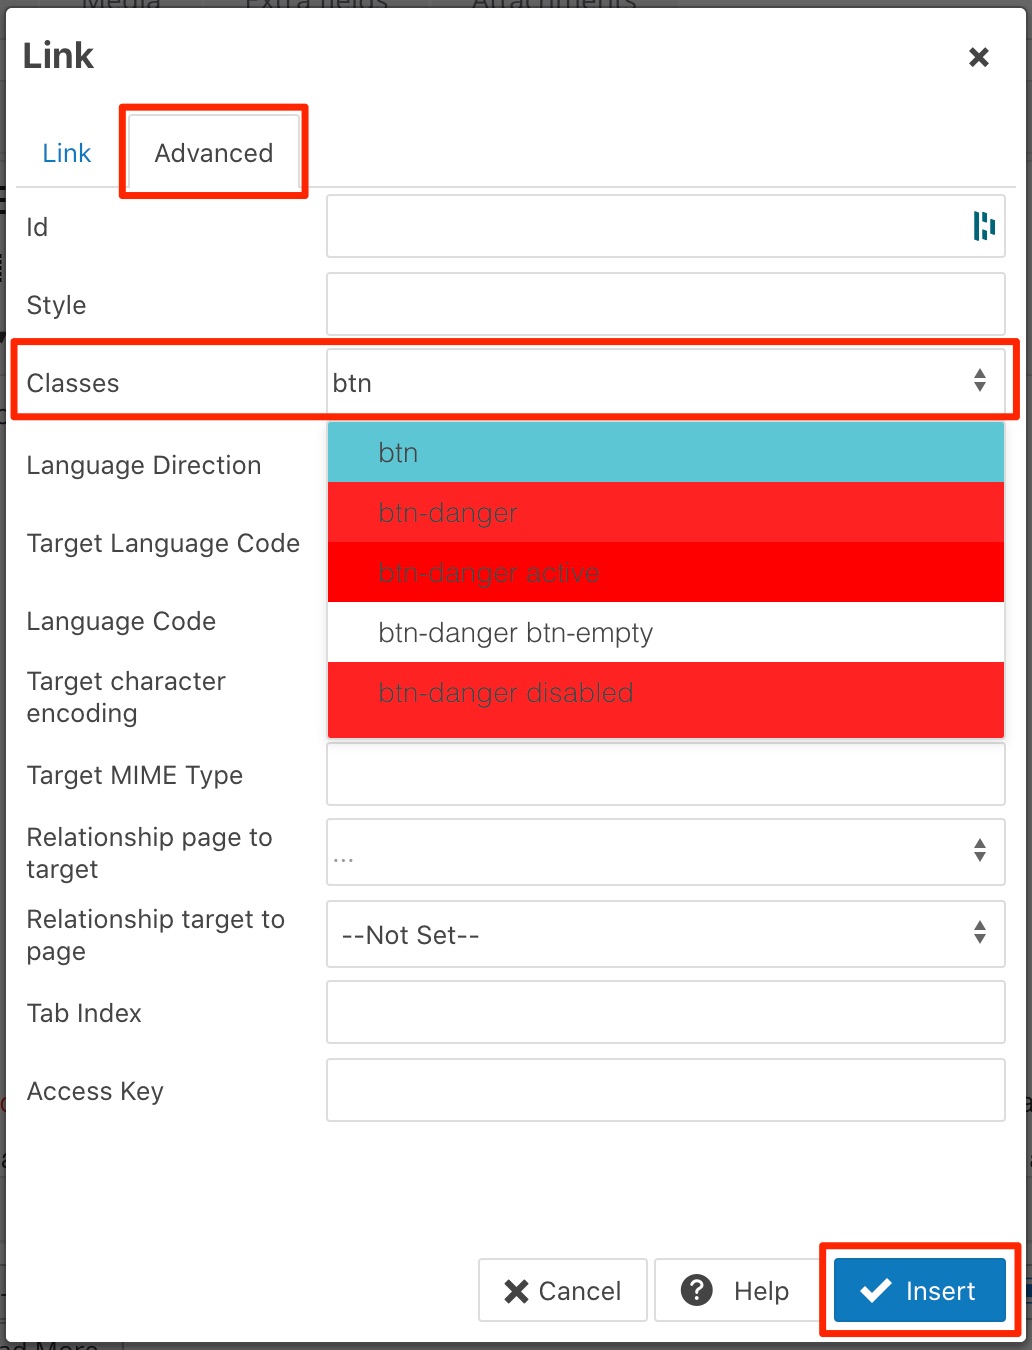
5. A button should appear over your copy now. Save & Close. Check the button on your published website to ensure it's working the way you intended.
Add a Video to an Item
1. Post your video to YouTube, Vimeo, or some other online video hosting.
If this does not work please contact
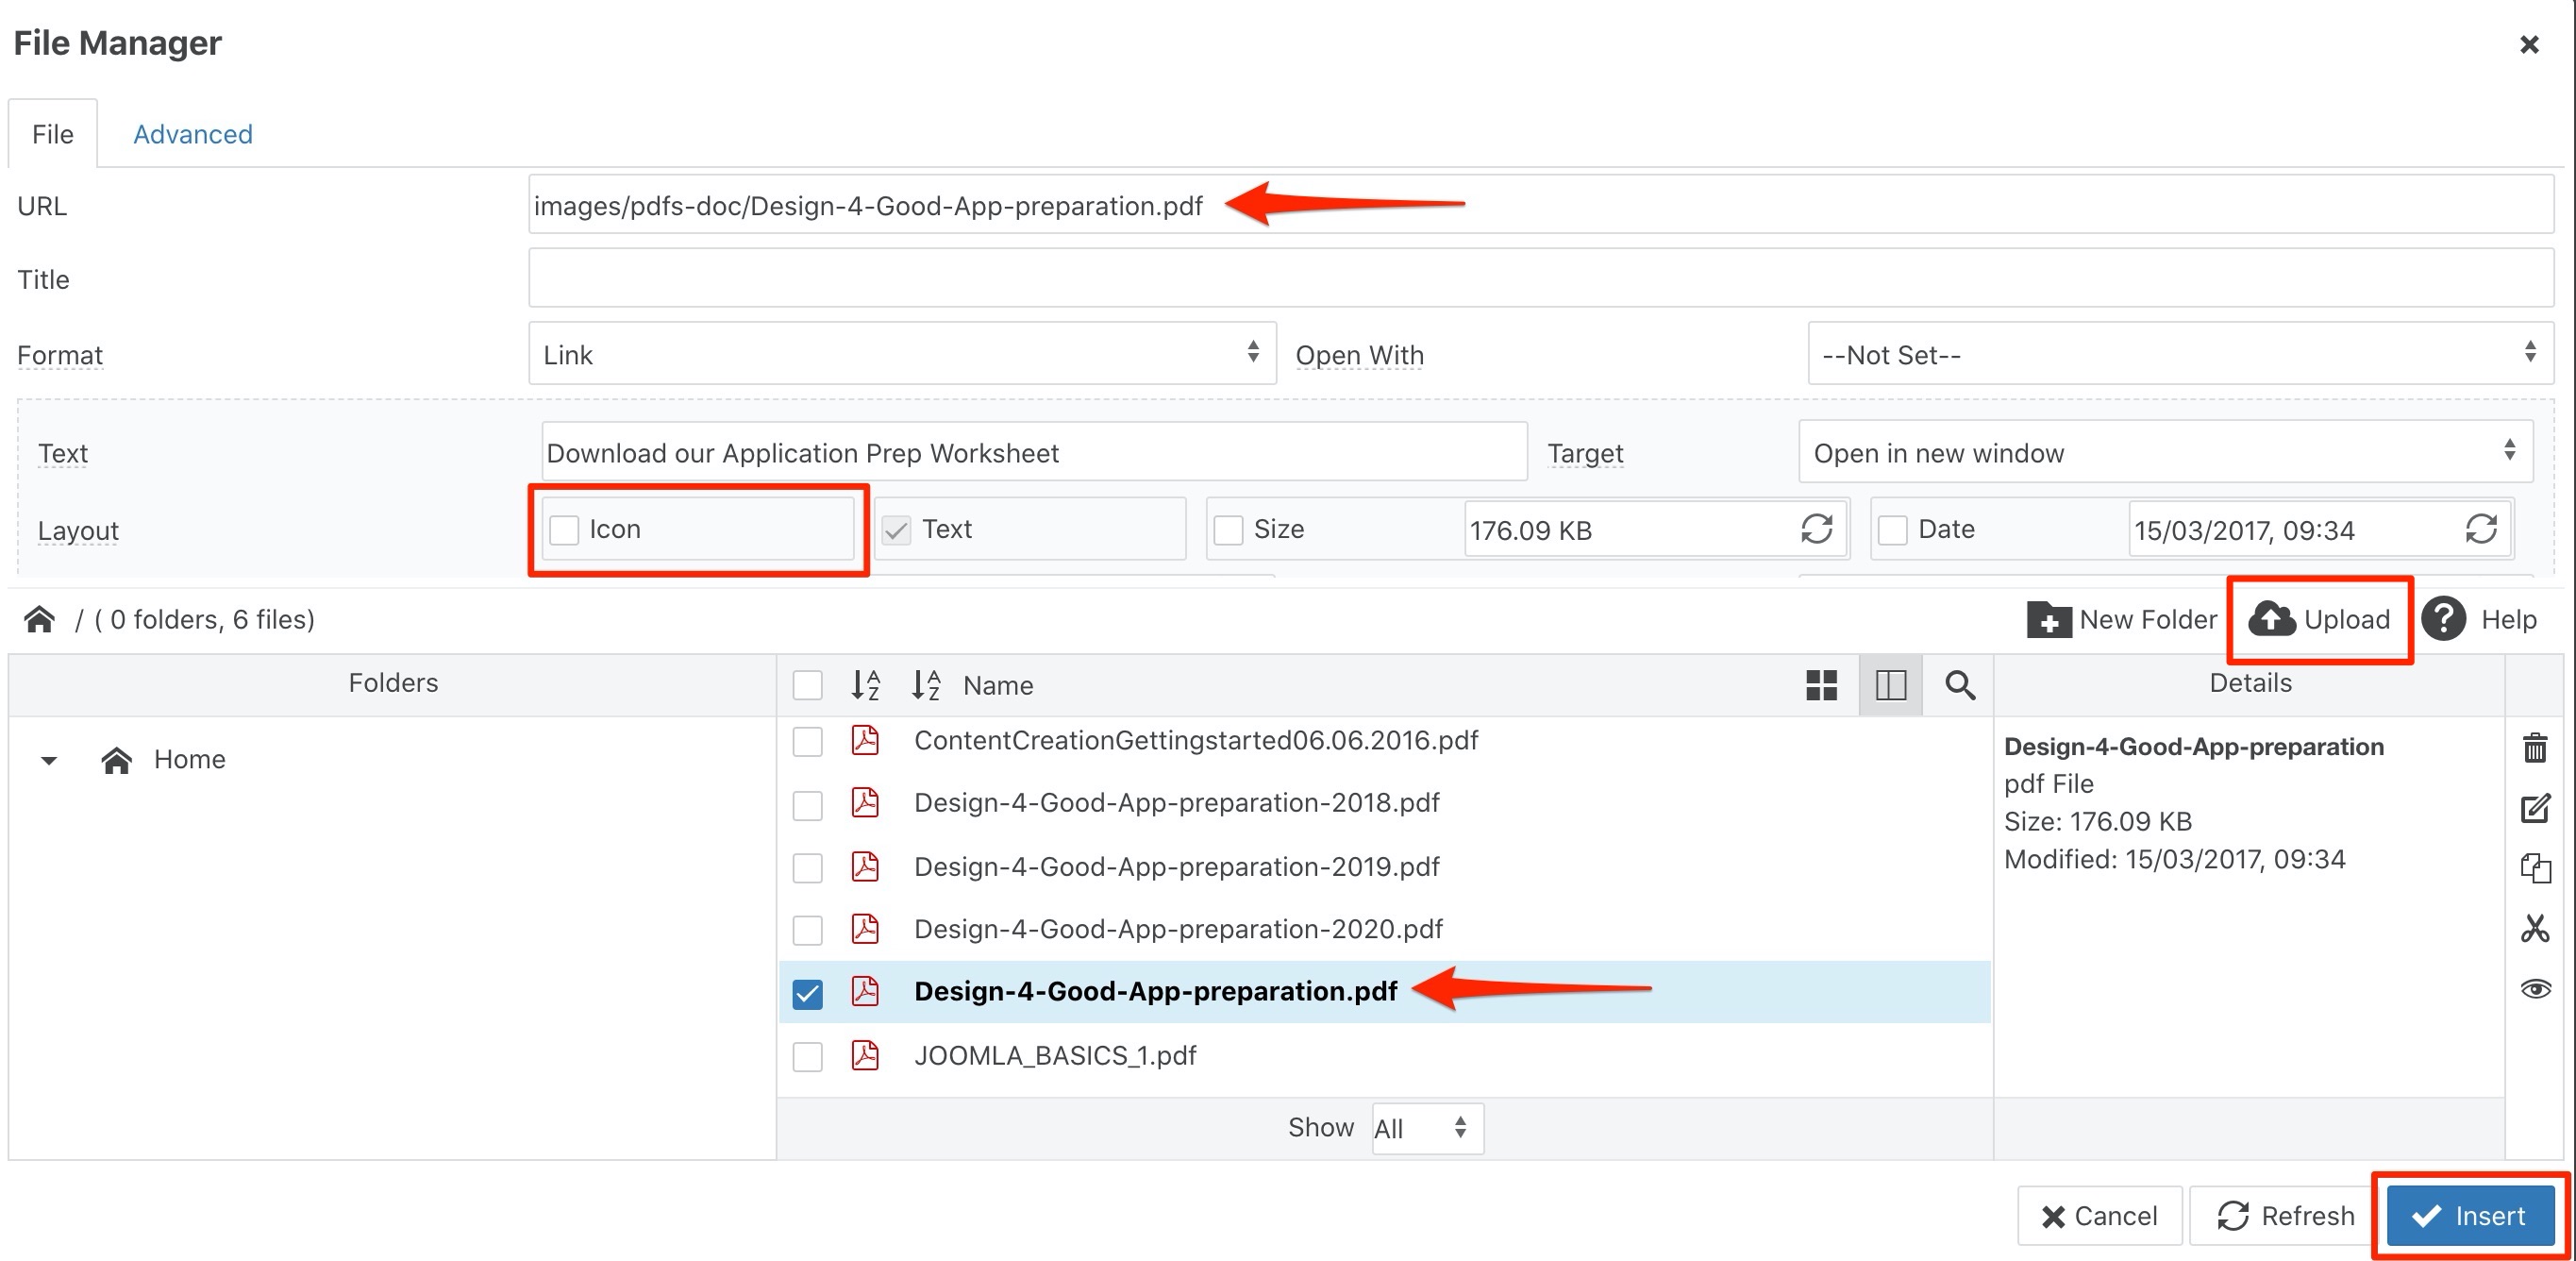
Add a PDF or Document
1. To insert a document for users to download (pdf, doc, xls, jpg) into your K2 Item, write an intelligible user-friendly phrase (i.e. Download the application) and highlight.
2. Click on the Insert/Edit File icon.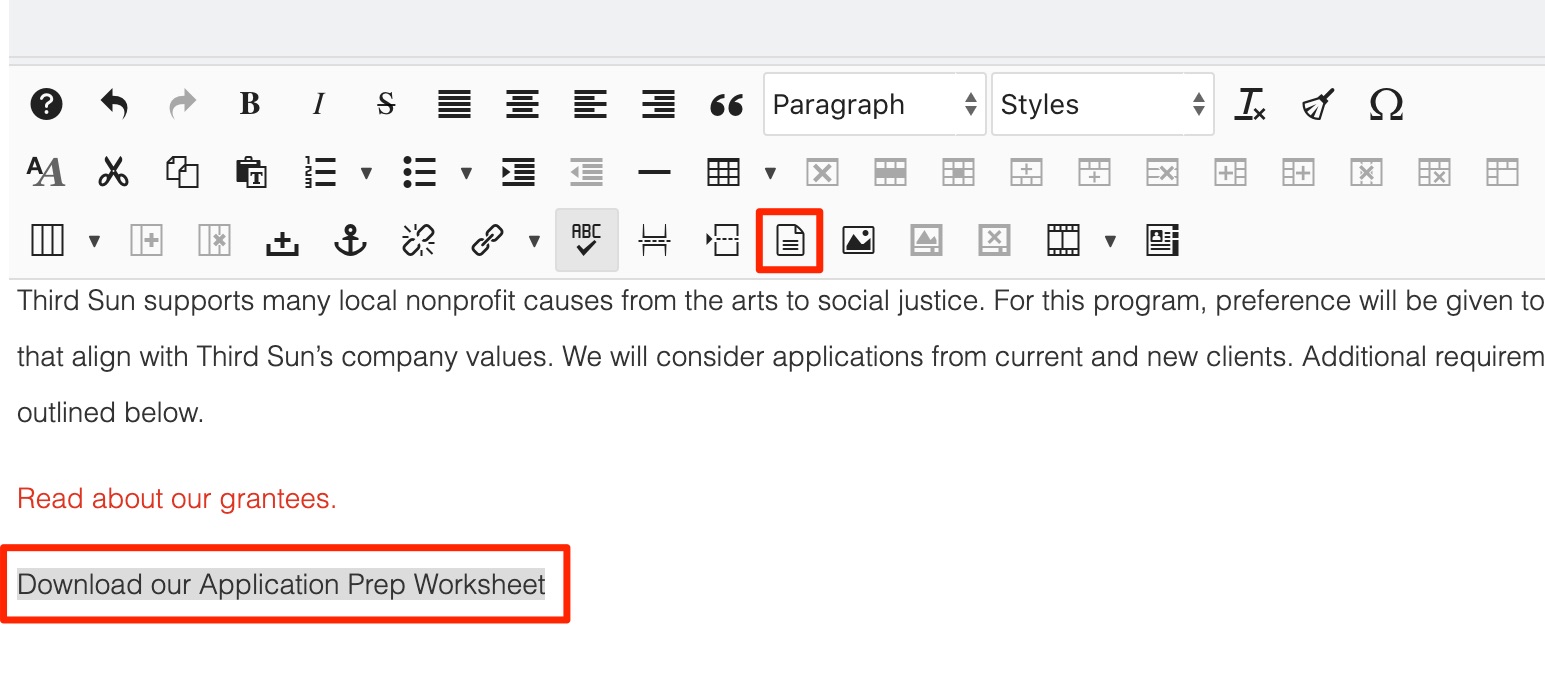
3. Select an existing file or upload a new file by clicking the Upload icon (arrow pointing up on the right side of the File Manager pop-up).
4. Once uploaded, click on the file title twice. Once to select, and another time to populate URL. Check the box “Icon” if you want a PDF or Word Doc icon to appear. (Some of these options may be preselected by default for you, and some versions of Joomla will automatically add the icon.)
Then click Insert.
Optional: If you want the PDF to open to a specific page, i.e. page 2, add this text to the end of the URL before clicking Insert: #page=(the page number)
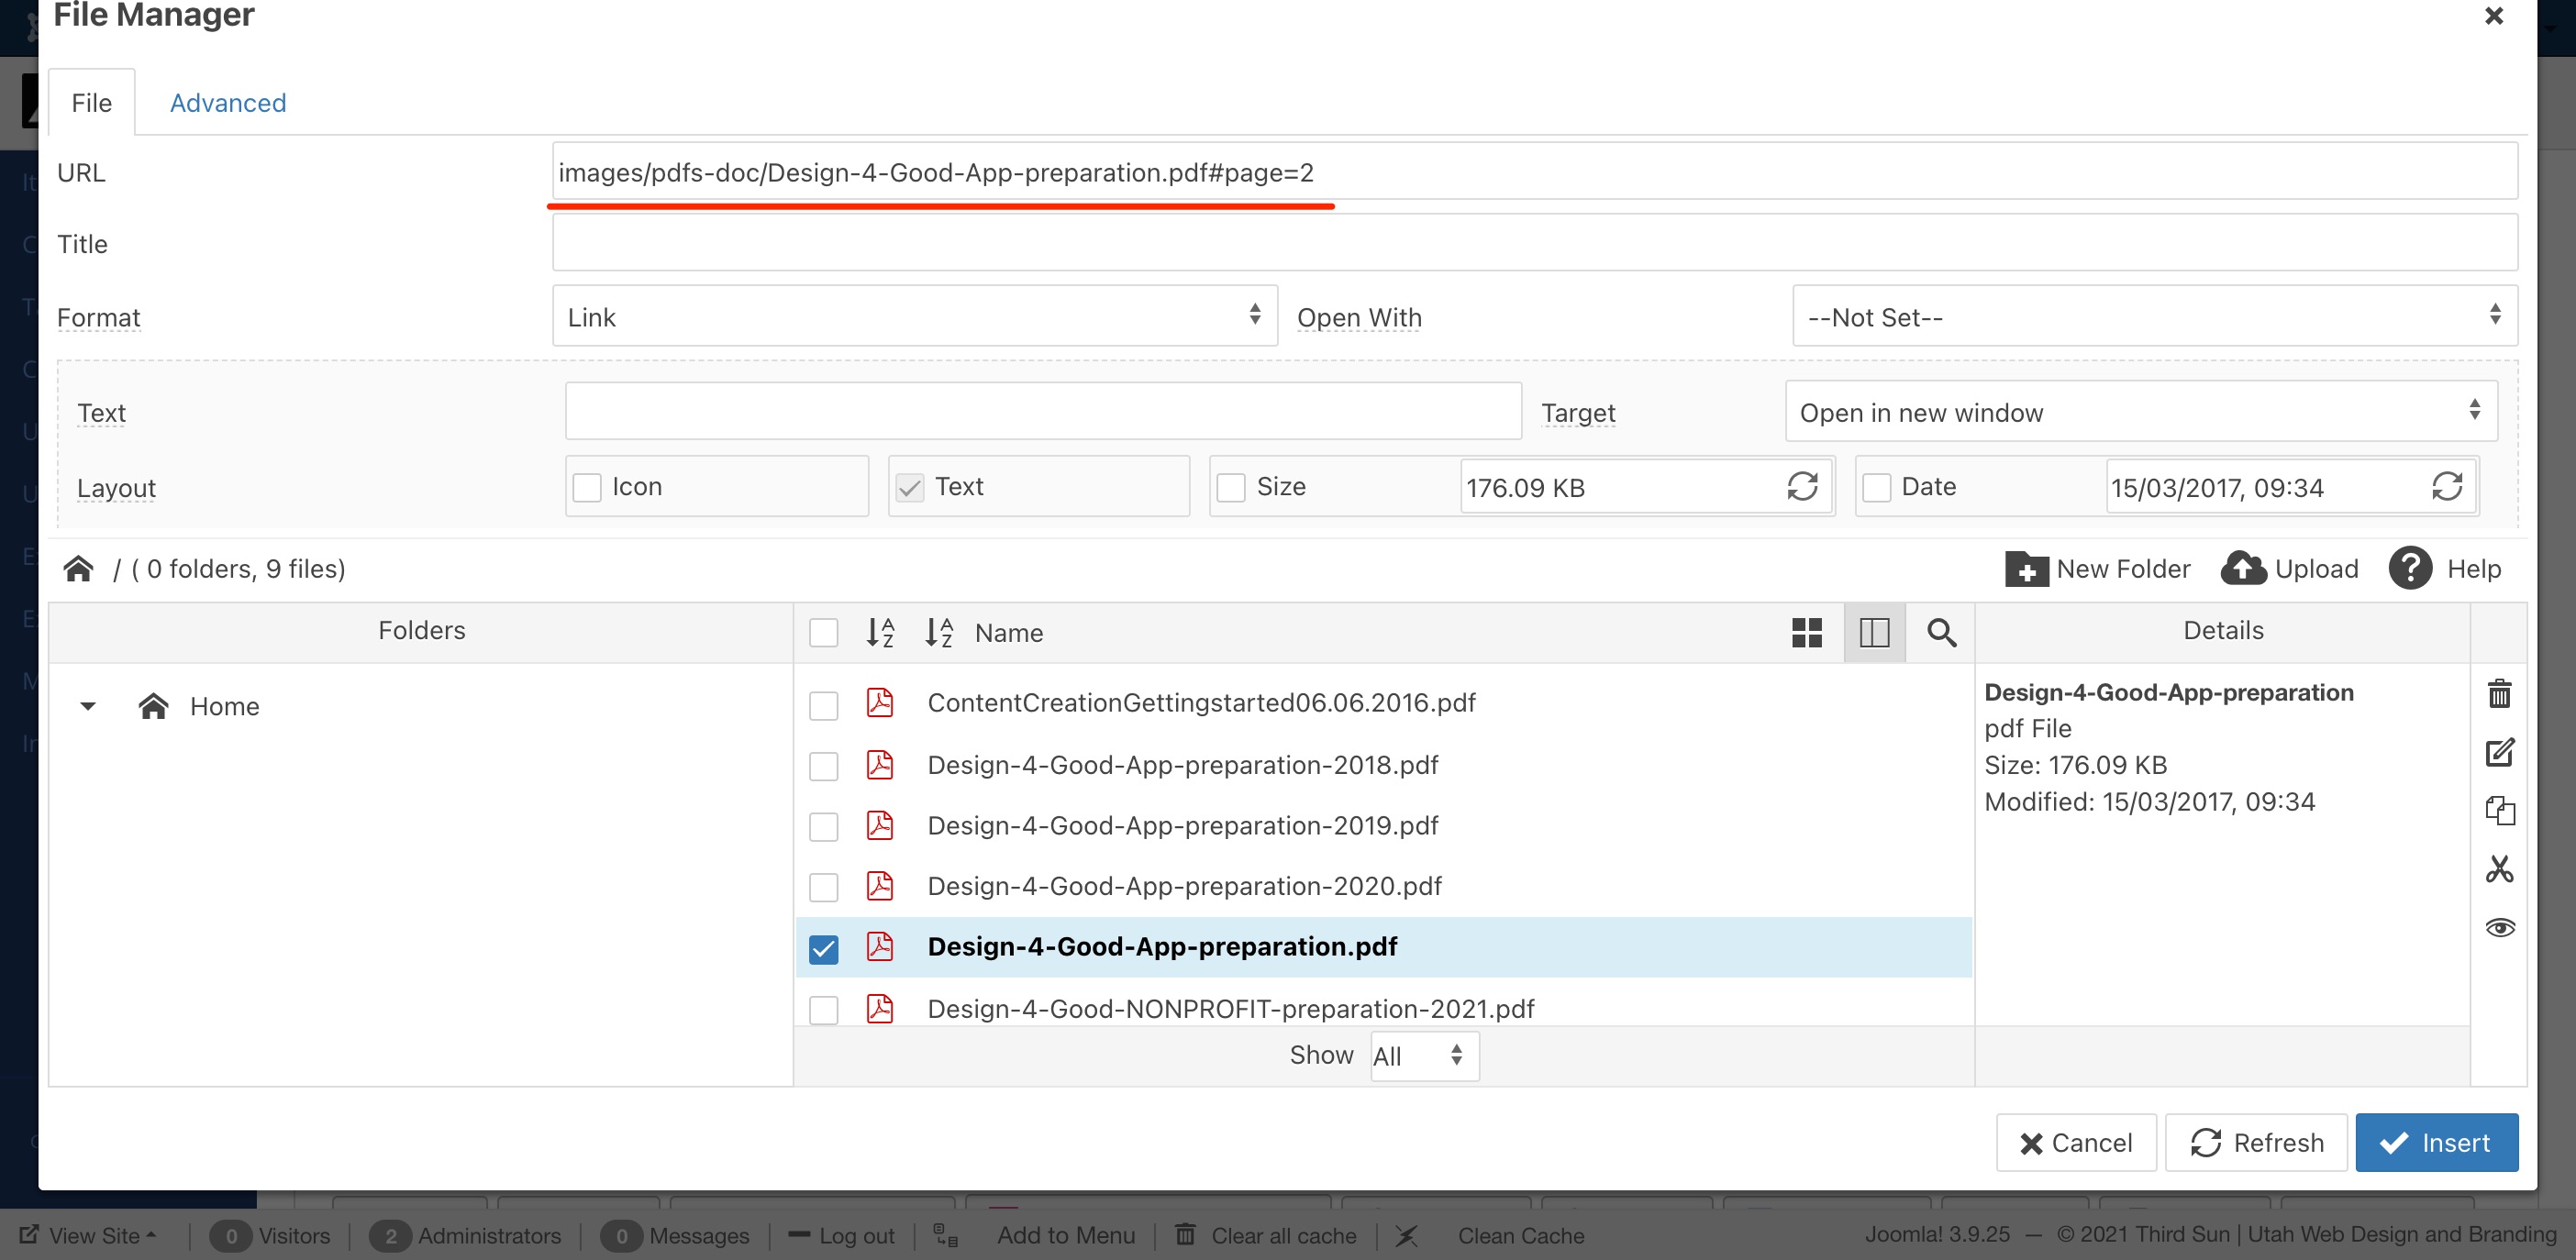
5. Your selected text will now indicate a link has been created, and an icon will show.
6. Save & Close.
Adding a "Read More" to Define Intro Text
Sometimes you have a page like Staff or Blog with many items, and you want to display a bit of intro text for each item on that main Staff or Blog page like a job title or the first sentence, and then allow someone to click the item for a full description. This is accomplished with a "Read More" break. Below we walk through an example:
These are a consideration in the site's design from when it was built, if you have a staff or blog page using them already then your site was set up to use them. If you don't have them already but have a new section where they would be useful, reach out and let us know and we can get you set up.
Managing Staff Pages
Note: These instructions are general and apply to many Staff, Team, and Board Member type pages that you may have on your website. Not all instructions may apply to your situation. Oftentimes it can be easiest to duplicate an existing staff item to maintain the formatting — just swap out the title, bio, image, etc. to keep the same formatting.
To keep staff pages easier to manage and display, each person has their own Article within the staff category. You’ll want to have their name, title, bio, and image (if applicable).
- Navigate to All Items from your Control Panel/Dashboard. Select the appropriate Category, i.e. Staff, Board, Our Team, etc.
- Select “New” in the upper left corner.
- The item's title is the person's name.
- In the content area of the item put the job title and then click the “Read More” icon (this creates a split between the title and the bio for the central landing page). Make sure their title is in the correct heading, (usually Heading 4) to maintain consistency on the site. After the Read More add in their bio, if applicable.
- If your staff pages have images, go to the image tab and upload a new image. You may need to crop your staff images before uploading to match the style and proportions of existing items.
- Save and close.
To remove a staff member, simply unpublish their item.
To rearrange the order of how staff members display follow the instructions found here
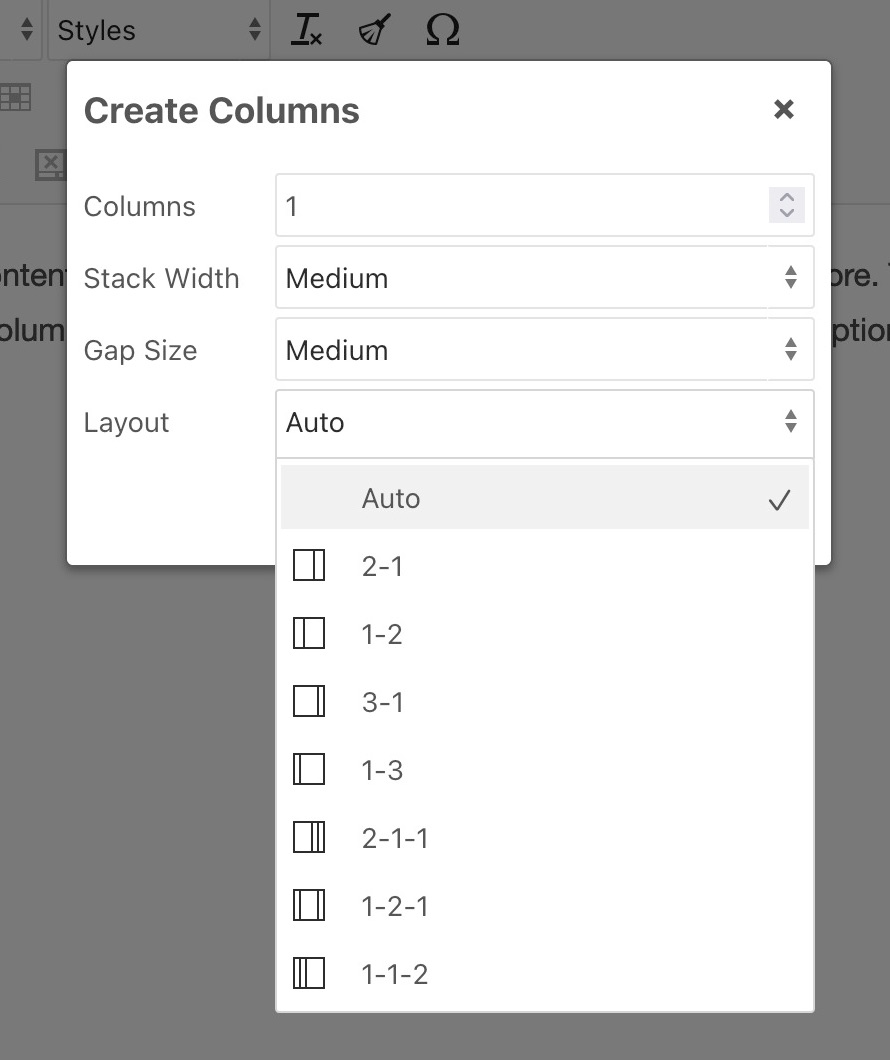
How to Organize Information with Columns
In our newer sites* we've often used columns to organize how content is displayed. These can contain text, images, and more.
To insert columns, first create some space or text below where you want to insert your columns. If you don't, it can be difficult to create text underneath them.
Next, click the columns icon and then select the number of columns and width you'd like — you can adjust the layout options as well if you're looking for columns of varying widths.
![]()
Here is how the columns below look in the editor on the backend:
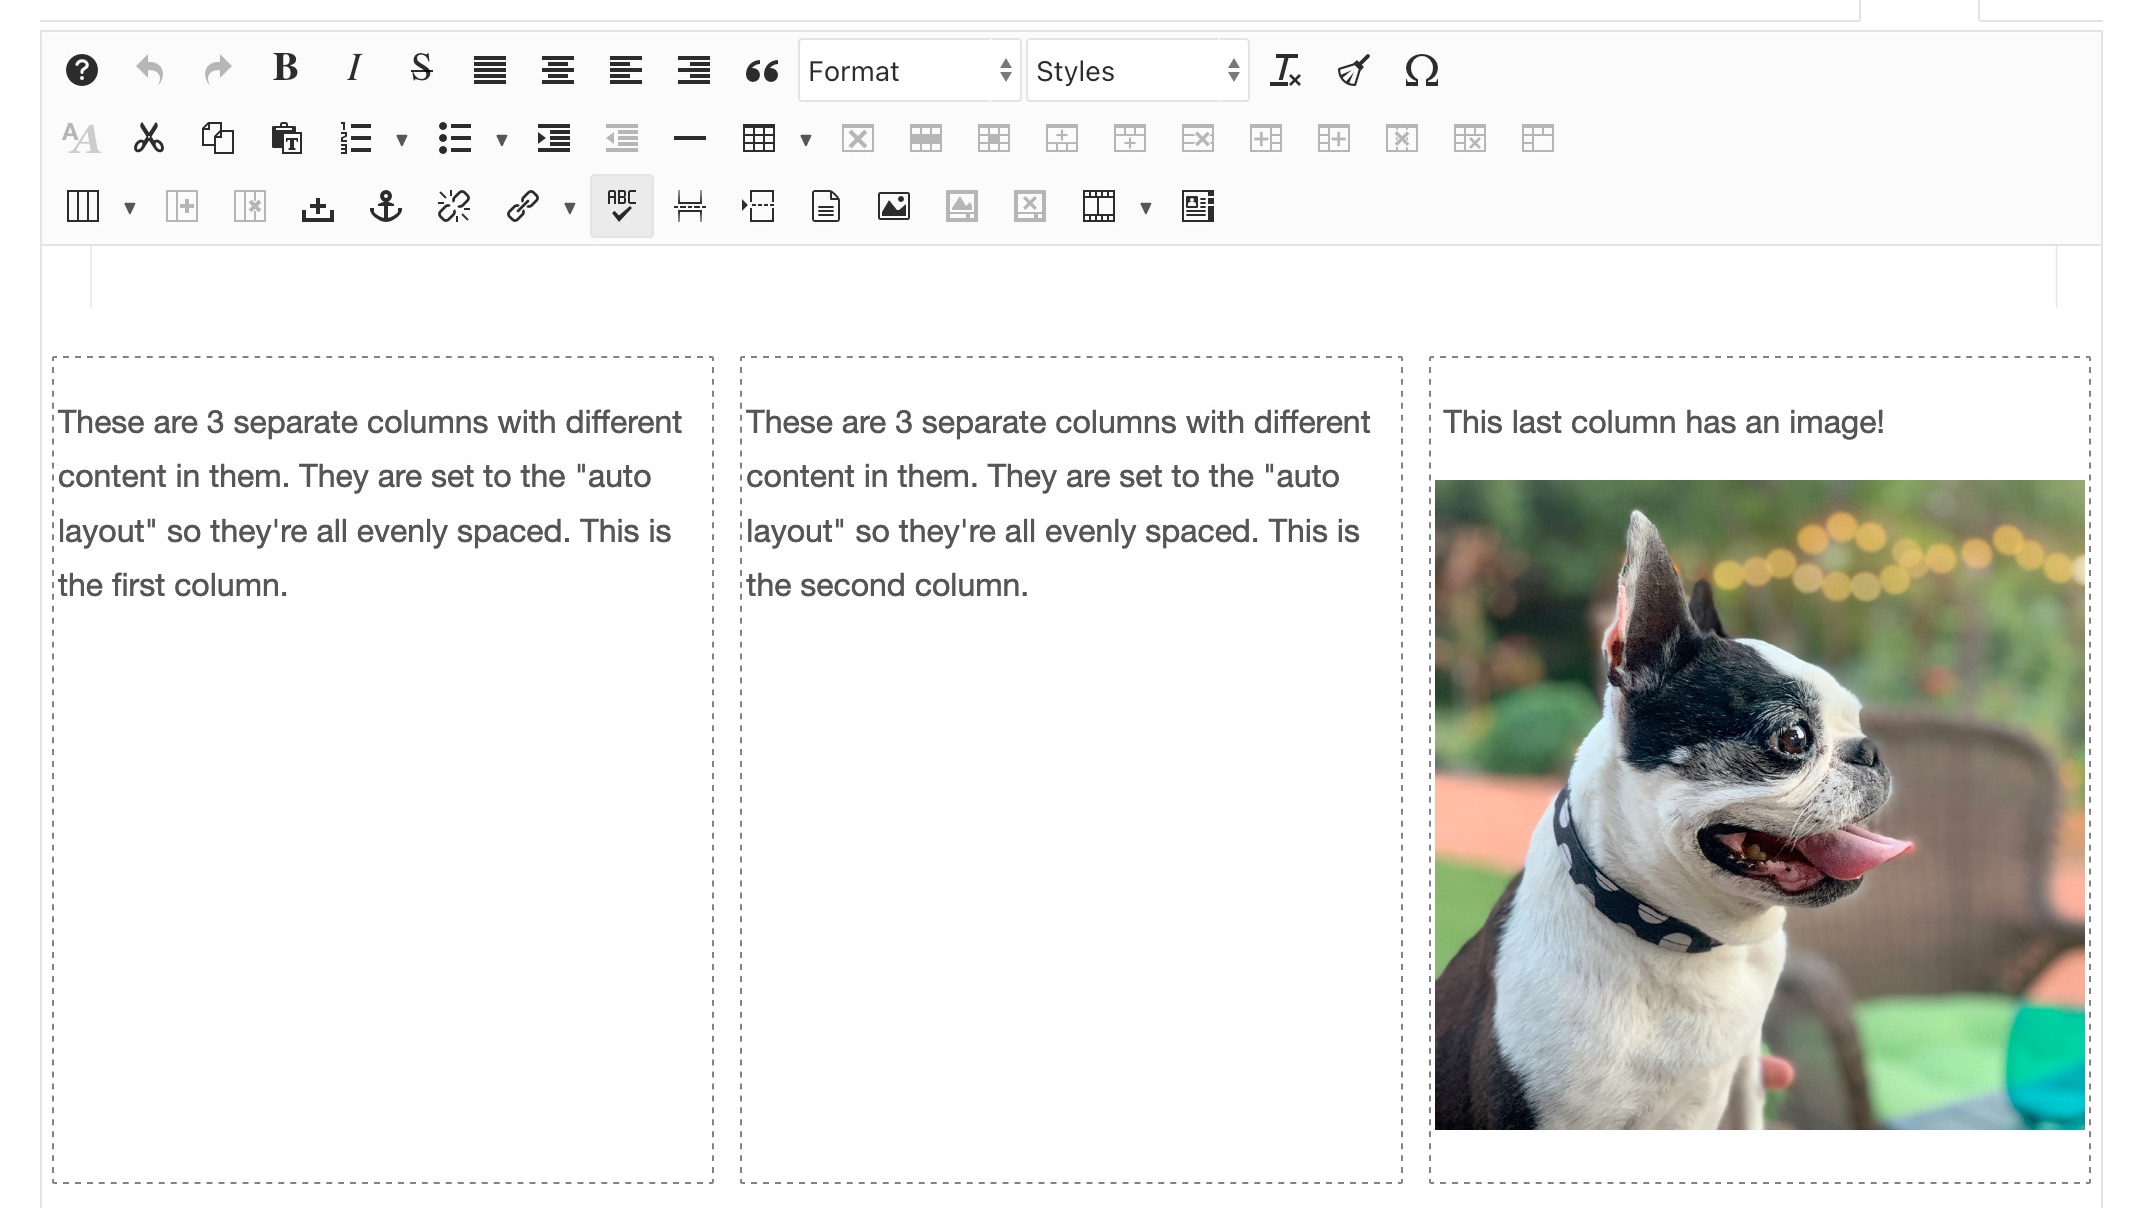
These are 3 separate columns with different content in them. They are set to the "auto layout" so they're all evenly spaced. This is the first column.
These are 3 separate columns with different content in them. They are set to the "auto layout" so they're all evenly spaced. This is the second column.
This last column has an image!

Tips for using columns
- Be consistent. If your site is using columns, use the same gap width and gap size as your previous columns existing items. Layout can vary if appropriate.
- We don't suggest using more than 3 columns, this prevents text from getting too small on mobile devices.
Change the Order of How Items are Displayed
Do you have a staff person or service you'd like at the top of your page? Or do you want your staff arranged alphabetically by last name? In most items the title is the first name so sorting by last name automatically isn't possible, the instructions given here will show you how to do it manually.
There are a handful of ways in which items can be displayed. In the case of news or blogs we often set it to display based on published date. If we instructed your site to display items based on Ordering (as we often do with Staff) then the below instructions should work for you.
Changes are recorded automatically. You can view and check them over on your published website (i.e. the frontend).
What Does Something in Curly Brackets "{ }" Mean?
If while editing the content in an Category or Article you come across something in these curly brackets/braces
"{ }" do not remove it.
These usually indicate a module or other code that can be used for a variety of reasons on a site's backend and editing or removing them can change how things display on the frontend of your site. You can learn more about modules here.
If you don't know what something in brackets is for and would like to find out, please feel free to contact us.