
Help Docs
Editing Menus and Navigation
Menu Manager
Typically speaking, you should make very few changes to the menu navigation.
Your menu navigation needs to remain user-friendly and as streamlined as possible, when it's changed frequently it can become unhelpful or confusing to your users. Plus, there may be horizontal spatial limitations on how many menu options are optimal on the top of your website. Attempts to edit it without careful work can cause issues and broken links. When in doubt, contact us.
All that being said, sometimes you'll want to make some minor changes. To access the Menu navigation and understand its structure, go to Menus > Main Menu or click Menus from the Control Panel. From here, you can add or delete options, but setting up menu items requires having already created the content. For full instructions on how to add Items to your menu see the sections below.
If you need help making adjustments (i.e. adding an item or deactivating an item), you can contact Third Sun Support at
Adding to a Menu
While we don't recommend changing menu items often, or adding/removing tons, sometimes adding to a menu is necessary. Here's how to add them using the Menu Manager. You can only add things to a menu (like Items) that are already created, so once they are created you can follow the steps below.
Quick-Adding a New Page to Main Menu
While we don't recommend frequently adding to your menus, or having long menus with lots of items in the dropdown, we know that sometimes it's necessary to add to a menu. If you've created a new Article here's a quick way to add it to the main menu —this shortcut only works if the page you want to add is an Article.
1. First, open up the item that you'd like to add to the menu and check that it's published. If you've just created a new article, be sure to click 'Save' before following the next steps.
2. When you open the item (or save a new one) you'll see a dropdown under "Save & Close" that says "Save to Menu". Note: you will NOT see the dropdown until the article is published and saved.
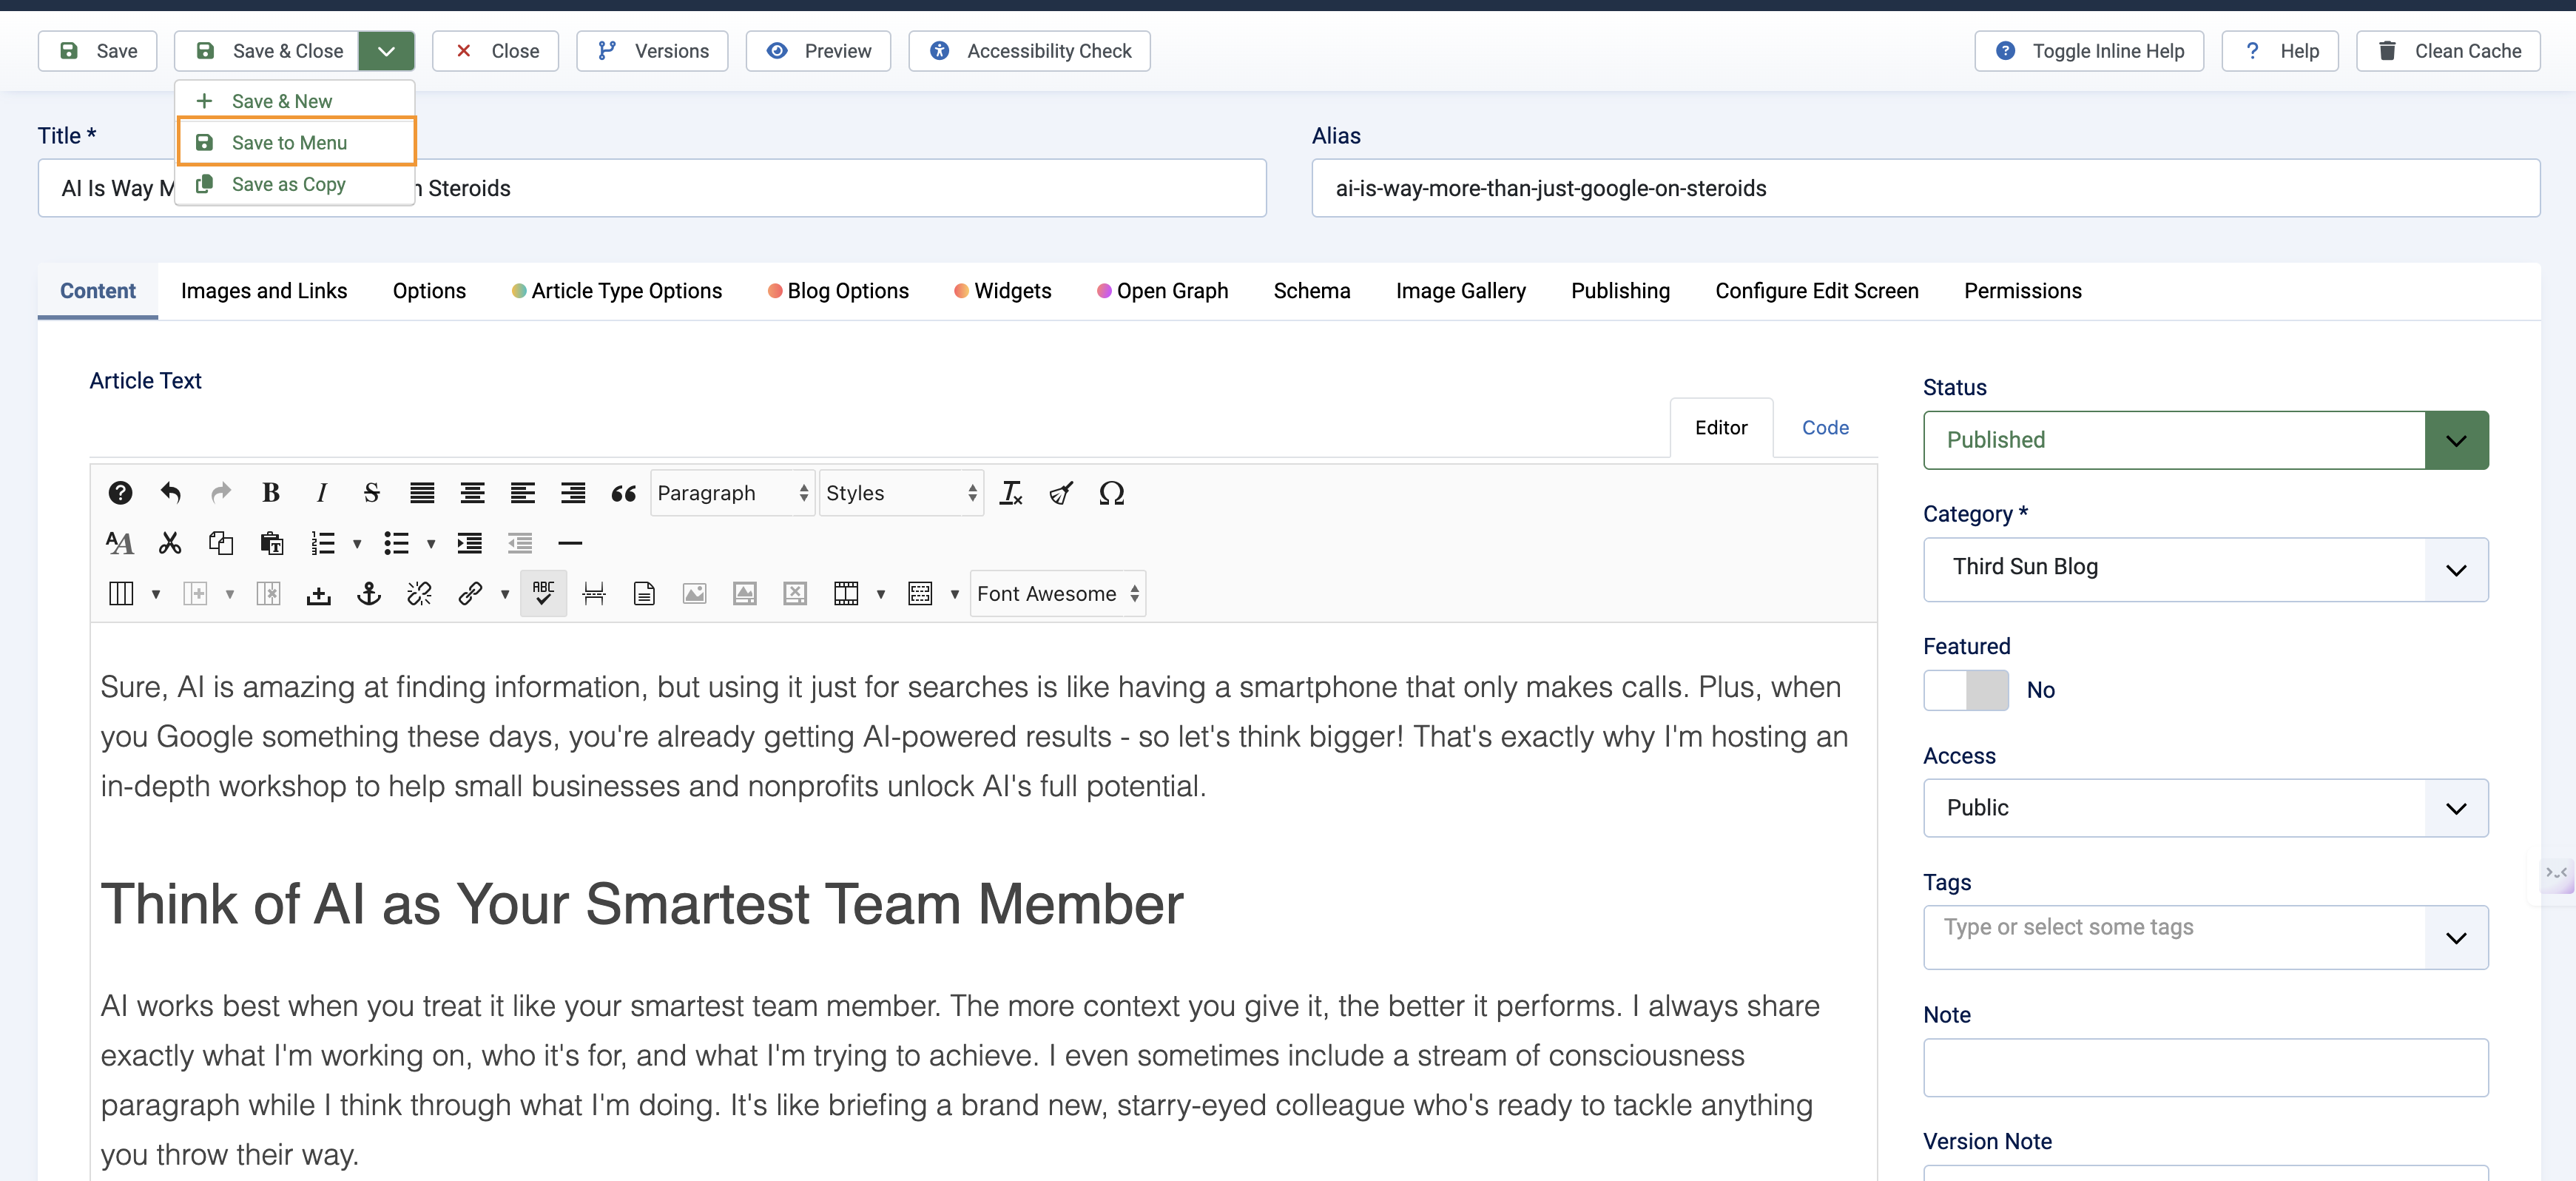
3. Next, you'll see a window pop up that allows you to select which menu you'd like to add the Article to — you'll likely be adding it to your Main Menu, under a dropdown you already have, like About, Events, Get Involved, etc. Be sure to select which Parent Menu you'd like it to go under.
If you don't want your item to go underneath another Main Menu item, and would like it to be a Main Menu item itself (like Donate) then select 'Main Menu' as the Parent Item.
4. Once you've selected the proper menu to add to, click Save. Then close your item by clicking Save and Close.
Using Hidden Menus for Shorter URLs
Sometimes you have a page on your site that has a long link that you'd like to shorten. This is handy when you want something short and snappy to refer to like in a flyer, or just for an easier time remembering frequently used URLs like donation pages or online shops.
1. From your top navigation bar select Menus > Hidden > Add New Menu Item. 
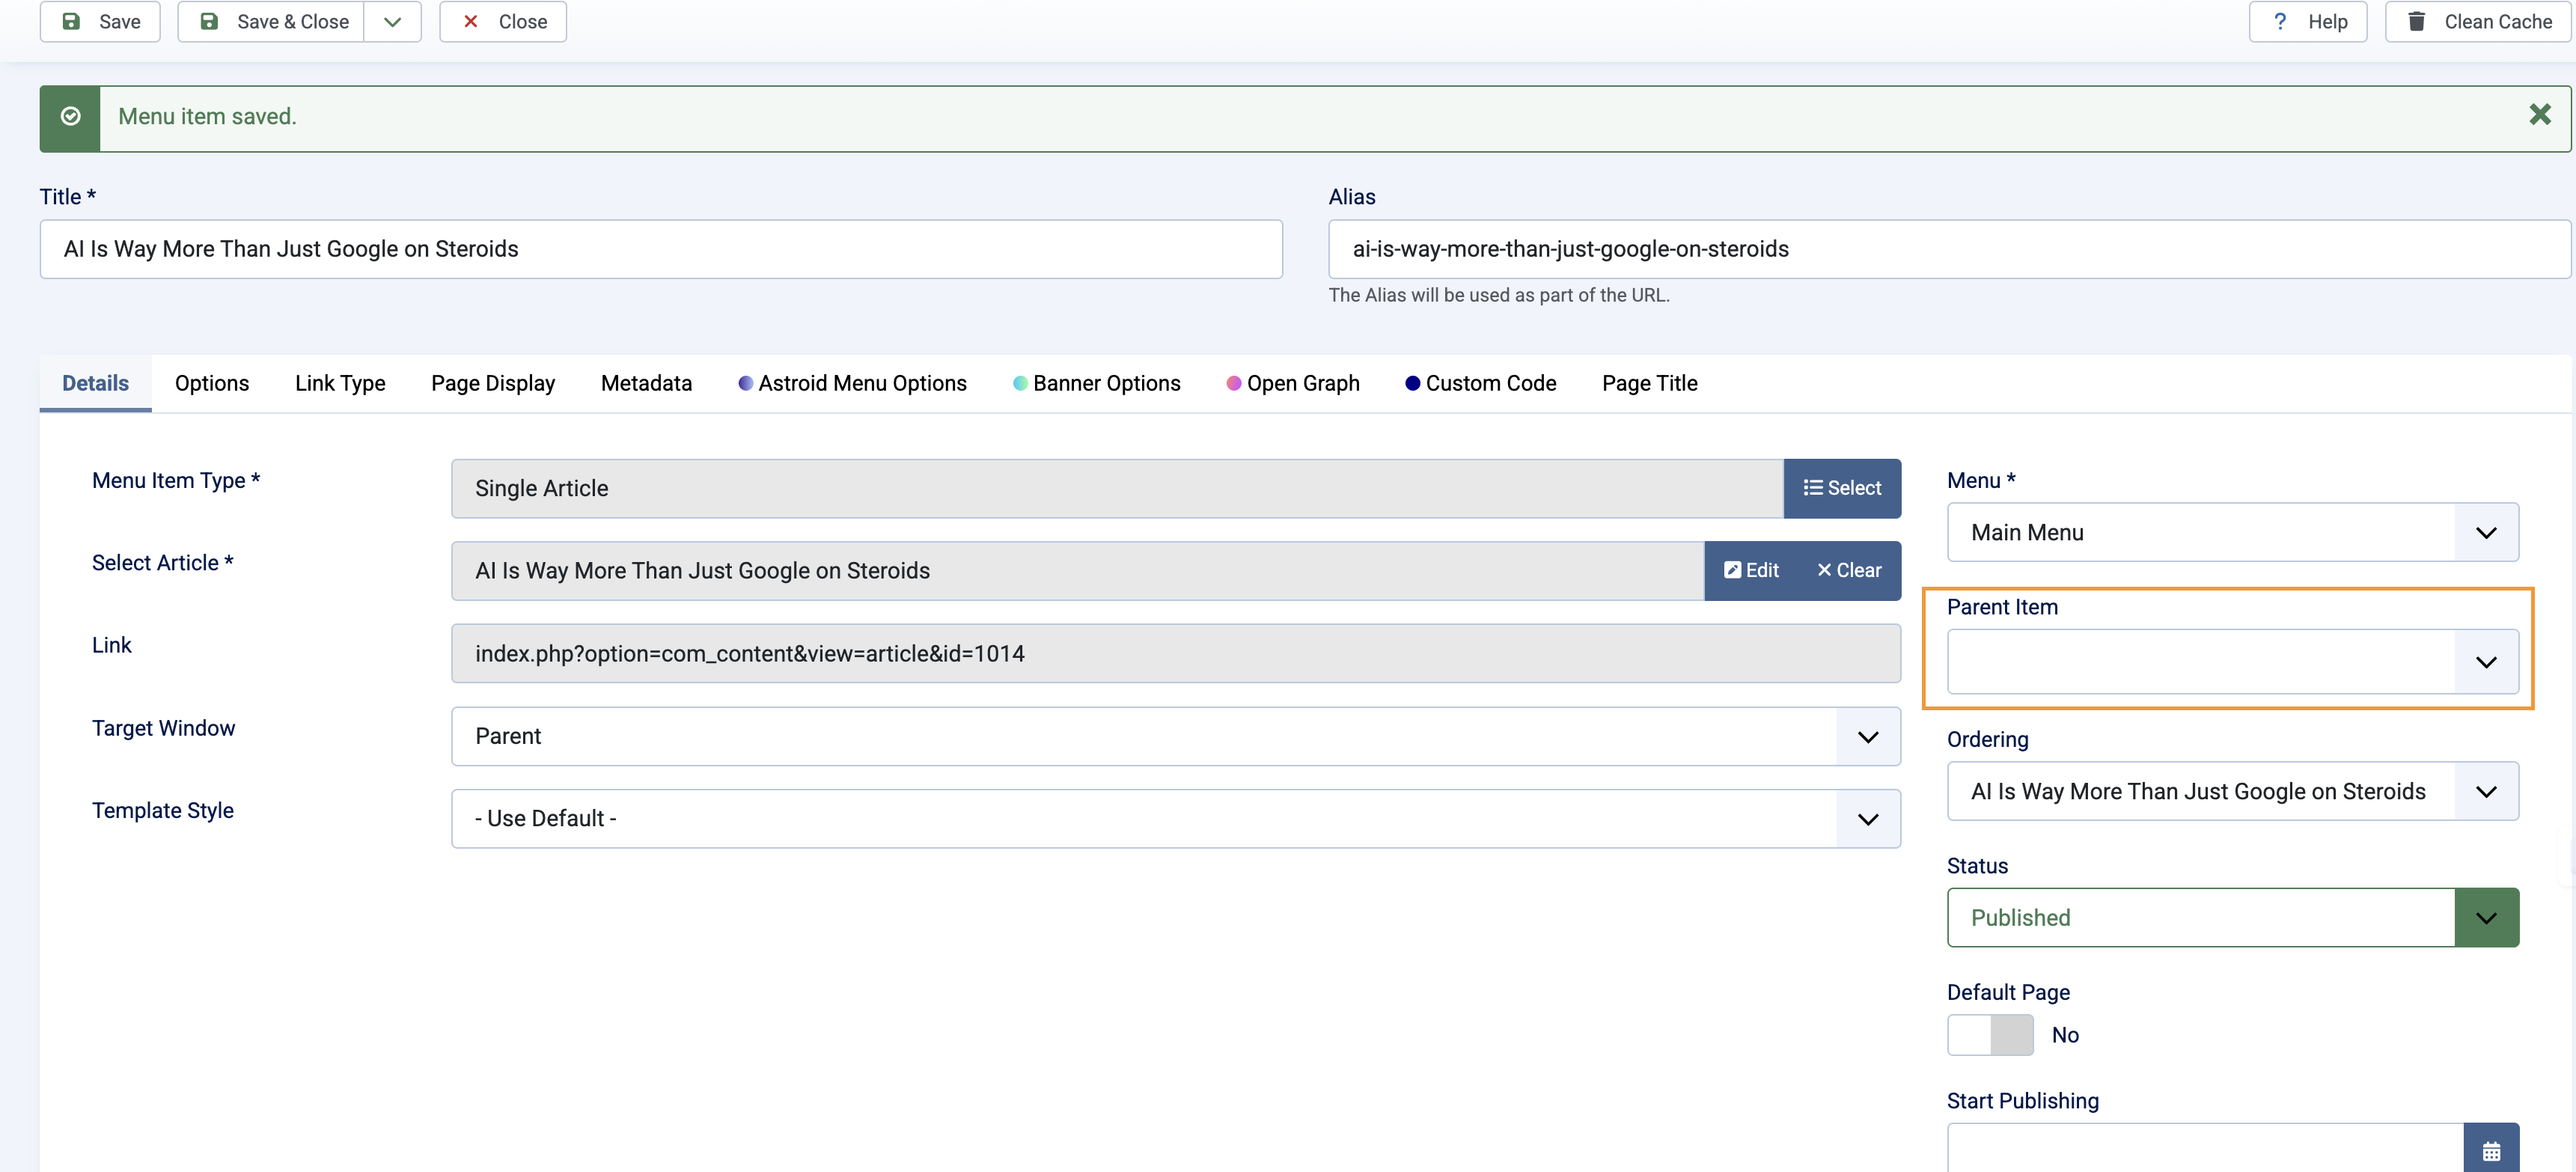
2. The next steps are almost identical to steps 2-4 outlined here: https://thirdsun.com/help-docs/editing-menus-and-navigation/adding-to-a-menu-from-the-menu-manager, but you need to add a Title Alias that should be the same as the new short URL ending you'd like. In our case we want the new URL to end /beer, so the title alias is "Beer". URLs should only contain letters, numbers or dashes. Follow the rest of steps 2-4 as outlined in the link above to select your desired Item.
3. Once your item is selected, you don't need to follow any more steps from that page. In our case we selected the Item "Utah Ale Trail". Your page should look similar to this:

4. Once you've got your Item selected, Save and Close. You'll return to the main Hidden Menus screen, and should see a message at the top in a green box that says "Message: Menu item saved."
5. Try out your new URL! It will be your main website address followed by a / and then the title of your Hidden Menu item, so we'd type in www.thirdsun.com/beer, and voila — a shorter URL for sharing our page!